I’ve always been a sucker for a perceived bargain. Time and time again, I’ve chased after a promising “deal” (car or motorcycle), and just as surely have suffered the rude reminder of the old adage “you get what you paid for”. Yet, in spite of years of “lessons learned”, I seem to persist in pursuing my unattainable quest.
My most recent “steal” came about somewhat by accident. During a routine browse through the motorcycle section of eBay, I spotted a classic(?) Moto Guzzi listing for which bidding seemed to be languishing at a value I judged to be sub-par. I’d owned a Guzzi before, a 10 year old California cruiser, and loved everything about it, but due to my short attention span, eventually turned it over to a new caretaker.
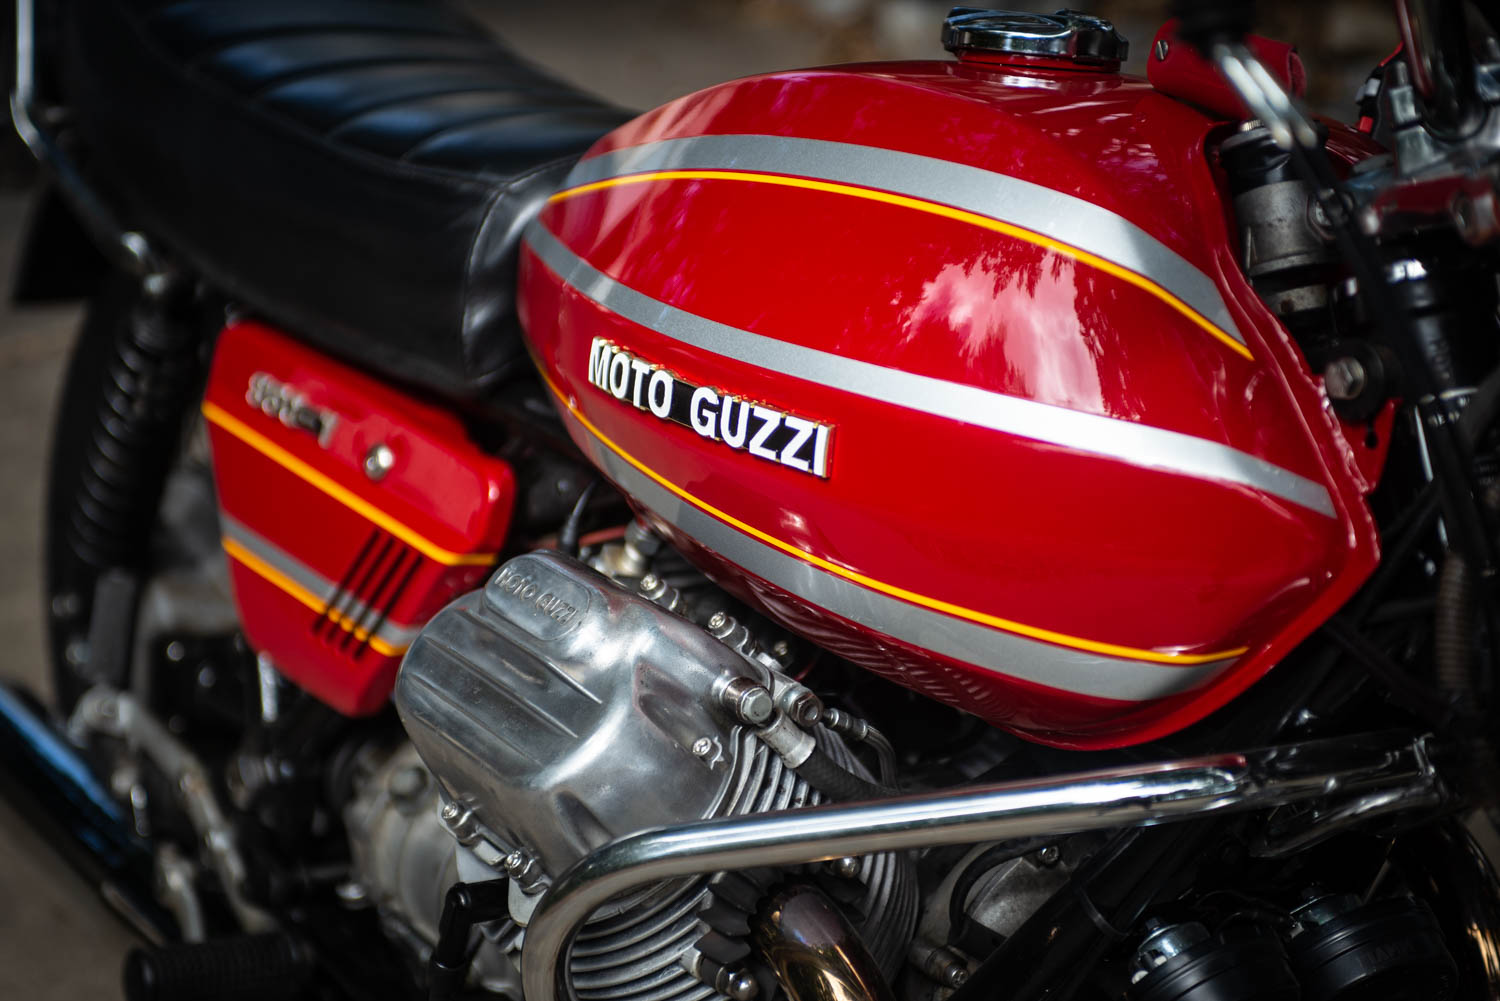
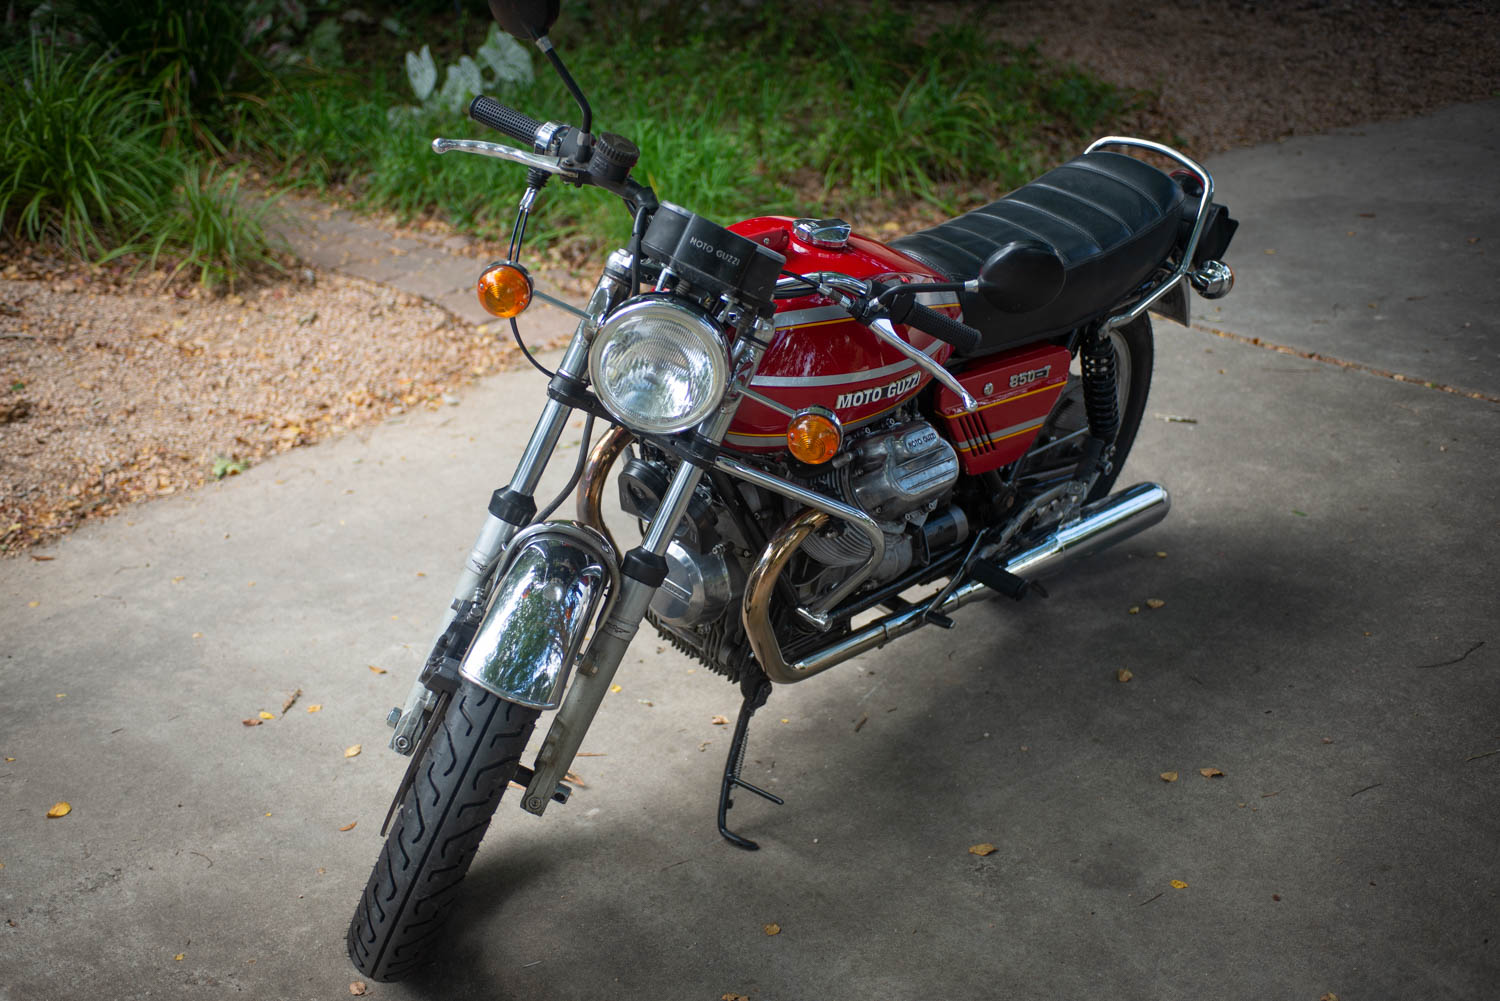
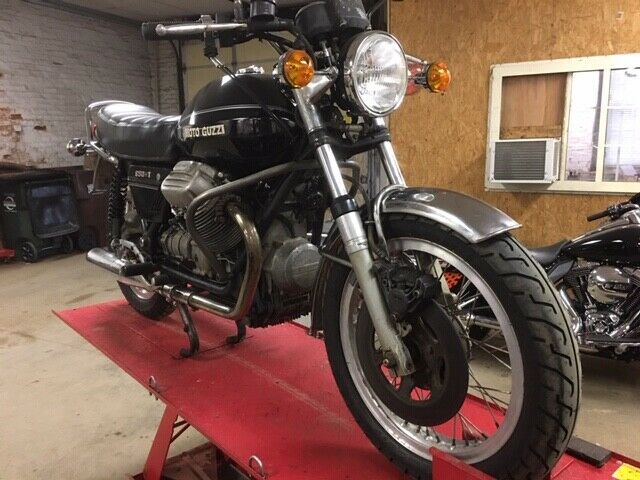
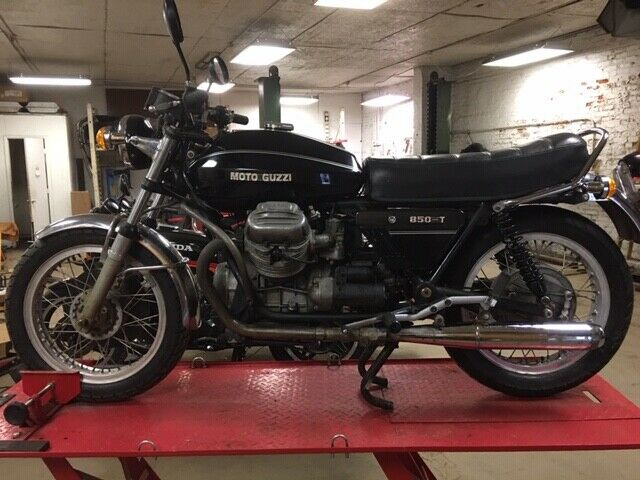
The “new” bike in question was a 1975 Moto Guzzi 850T model. Adding another bike to my “collection” was hardly necessary, wise, or convenient, but memories of the unique qualities of that previous Guzzi (encouraged by the siren song of LOW PRICE) piqued my interest. Before proceeding further with my story though, for the uninitiated, perhaps a brief examination of the Guzzi marque would be in order.
Moto Guzzi was established in Mandello del Lario, Italy in 1921, and has earned the distinction of being the oldest European manufacturer in continuous motorcycle production. Like most early bike firms, the engine and frame designs initially ran the gamut… engine designs of single cylinder, twin, semi-flathead (Exhaust over intake) of various sizes, and even a brief production of a complex V8 engine designed for GP racing.
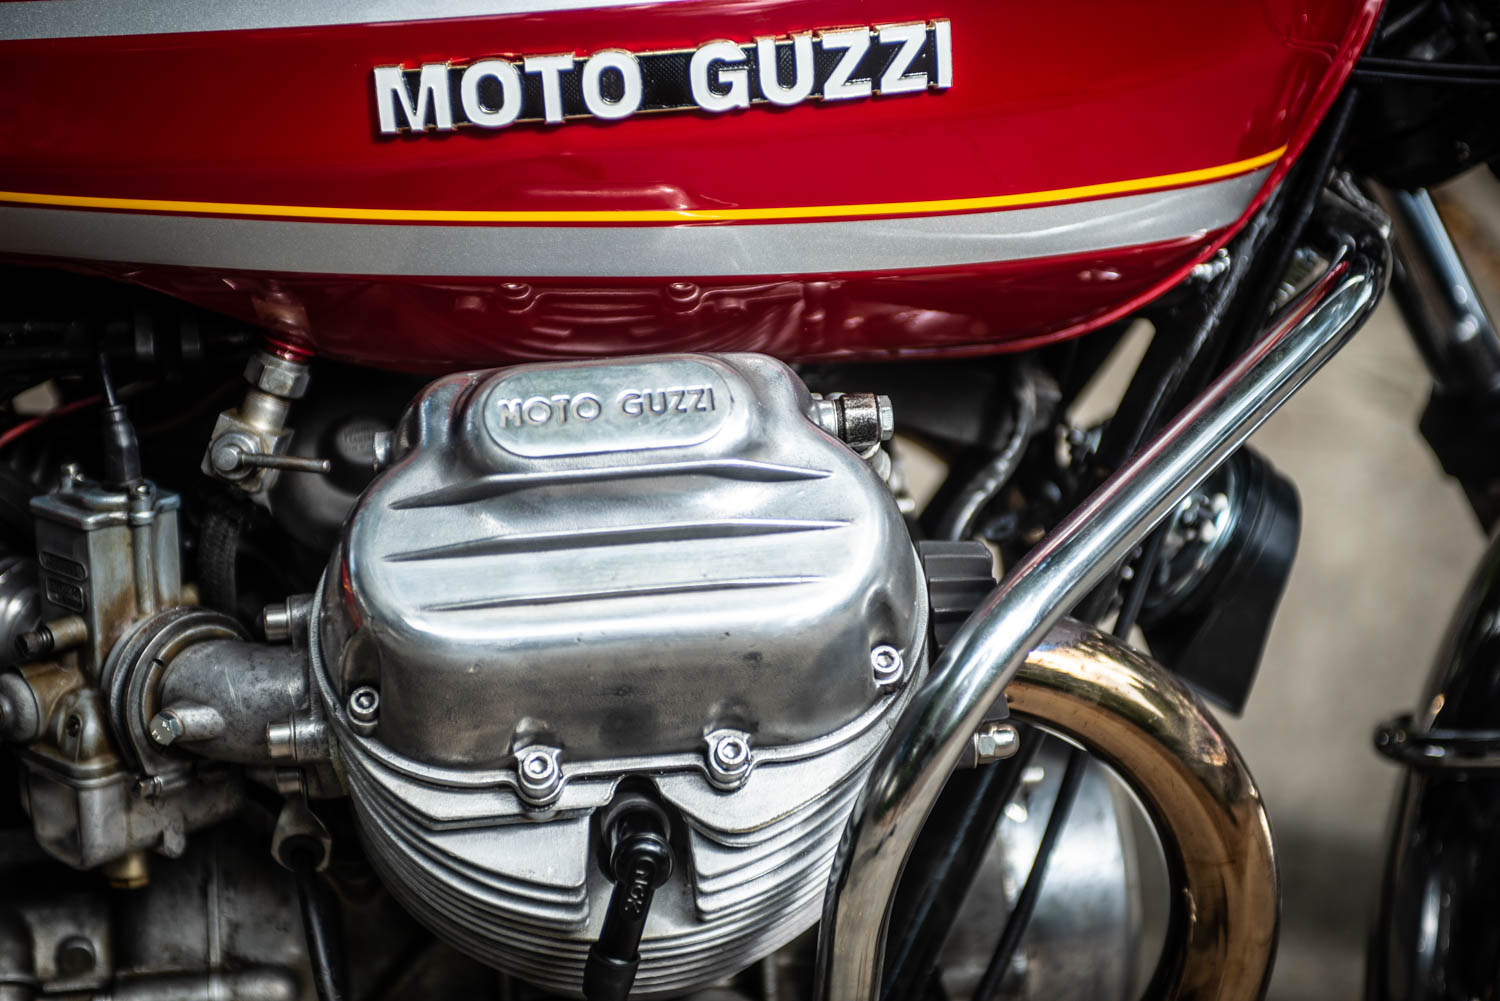
It was in 1967 however, that the iconic engine layout that has since been the recognizable feature of all Guzzi’s was designed. It was a unique design (only copied, to my knowledge, for a brief time by Honda with their CX series) featuring a 90 degree V twin mounted transversely in the frame (vs. the more common longitudinal V configuration):
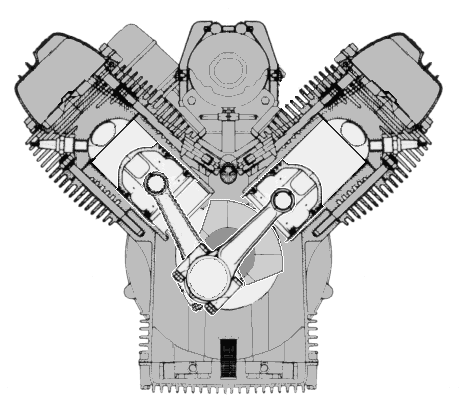
This transverse layout, similar to BMW’s 180 degree “flat” twins, lends itself most readily to an enclosed shaft drive to the rear wheel, in contrast to the more common chain and sprocket configuration for bikes with the crankshaft installed perpendicular to the rear wheel. The transverse design also contributes to an “endearing” trait known by Guzzi (and BMW owners) in which a sudden increase in engine torque (a blip of the throttle) results in the frame reacting to gyroscopic forces with a slight but noticeable movement in the opposite direction, similar to the twisting torque a single engine airplane pilot experiences upon application of power. It’s nothing of significant effect, but a curious footprint of this layout.
The basic V twin layout is one employed in many configurations by any number of bike manufacturers, in both transverse and longitudinal frame placement. Two pistons sharing a single crankshaft throw, as depicted above, is common. Therefore one might be forgiven in assuming a V twin such as the venerable Harley Davidson is a close cousin to the Moto Guzzi design, but that assumption would be incorrect. The Harley engine is designed as a 45 degree twin, vs the 90 degree layout of the Guzzi engine. Why is this difference significant? At an angle of 45 degrees (Harley) once one cylinder fires, the crankshaft then has to rotate a full 270 degrees before the second cylinder fires. This produces a lumpy, vibration-prone ka-pock-eta-pock-eta-pock-eta ride, apparently revered and appreciated only by Harley Davidson devotees. The remainder of the biker universe prefer an engine with firing pulses more evenly spaced (Moto Guzzi) for a smoother ride and actual visibility through the rear view mirror!
To my (limited) knowledge, Moto Guzzi, since initial development of the overhead valve V twin by Giulio Cesare Carcana, has produced V twins of this design exclusively throughout current times. Of course the engines have been continuously improved over the years, most notably with a major redesign in 1971 by engineer Lino Tonti. Engine sizes have varied over the years, but the basic design and visual appeal remain to this day.
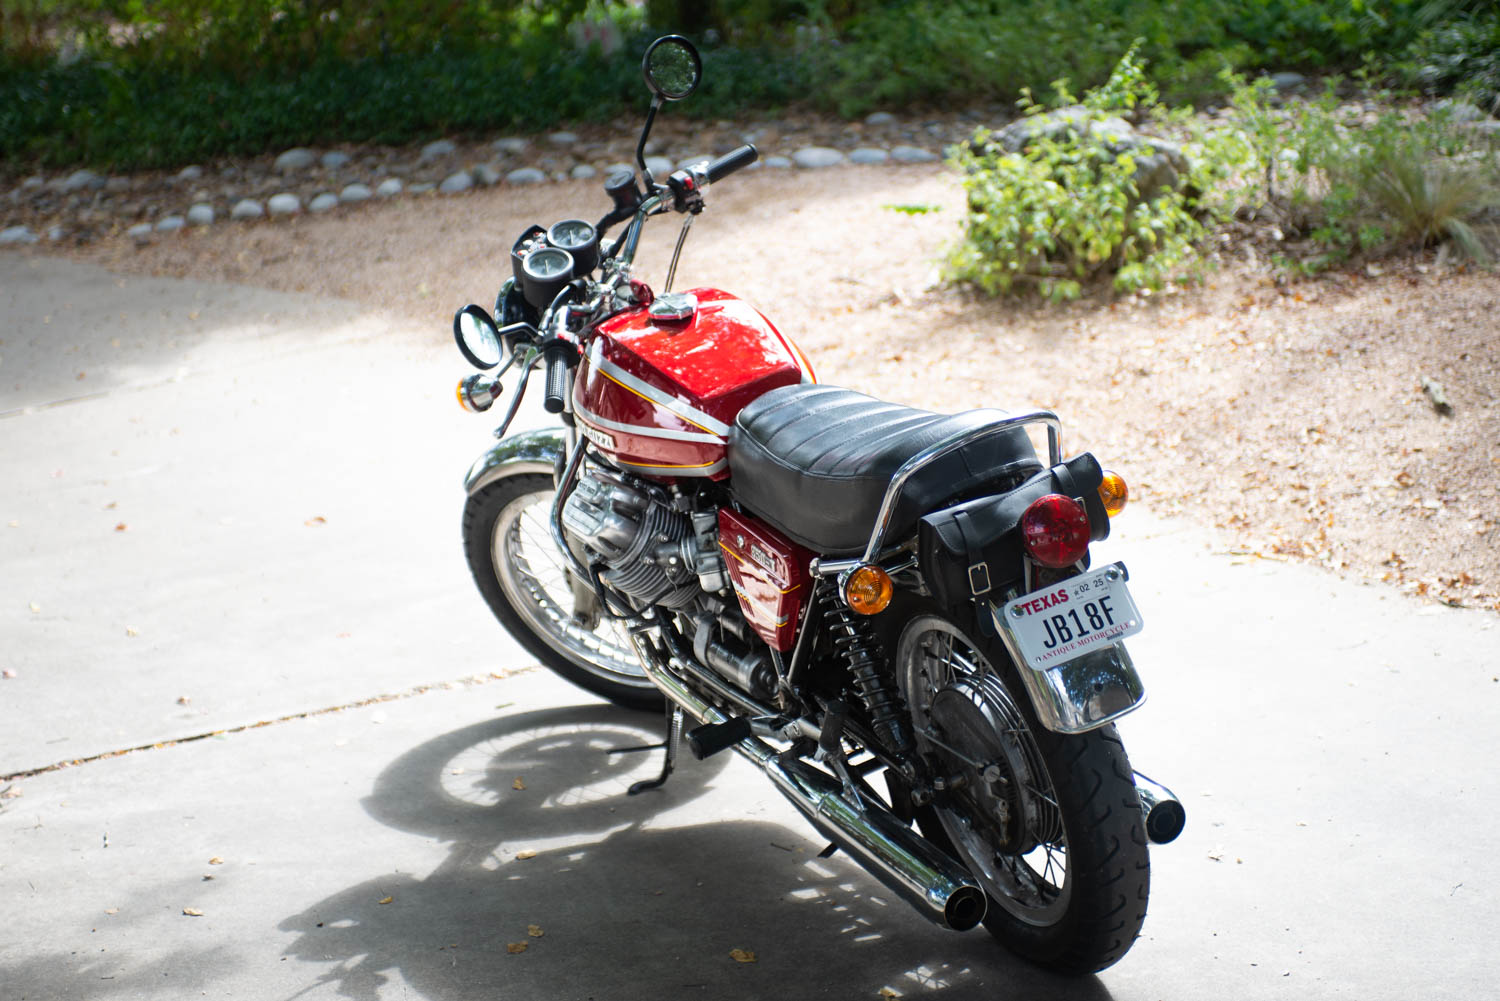
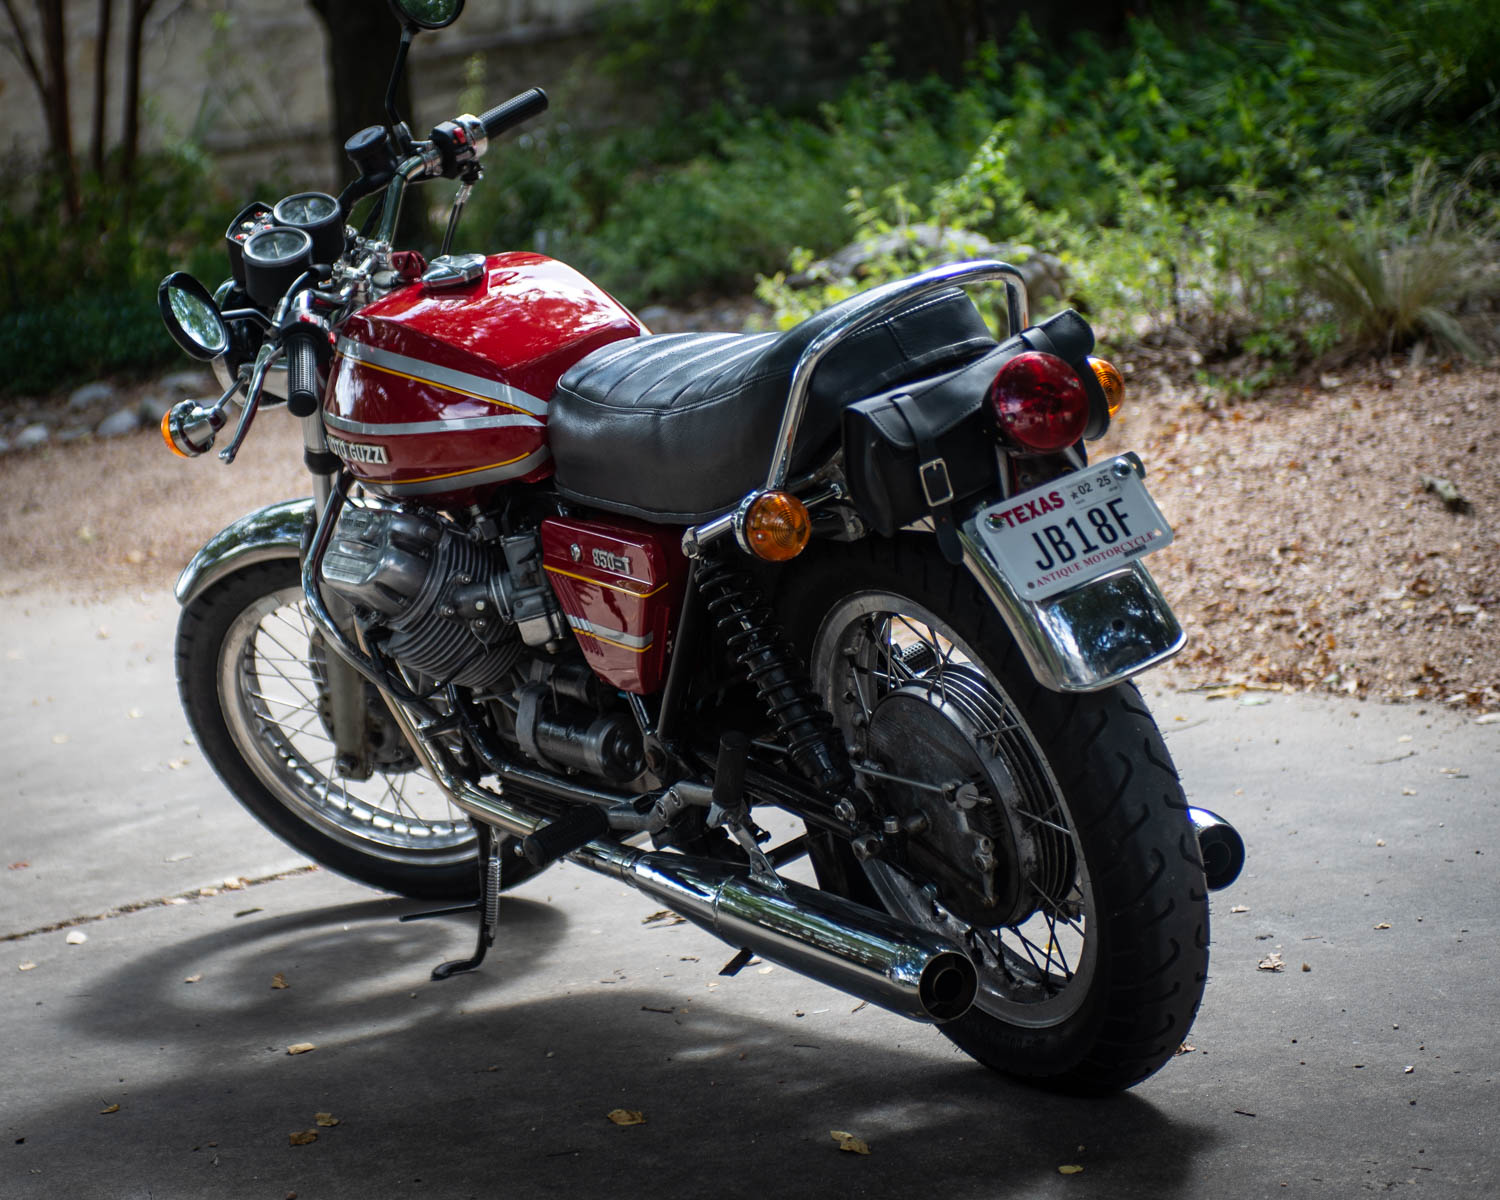
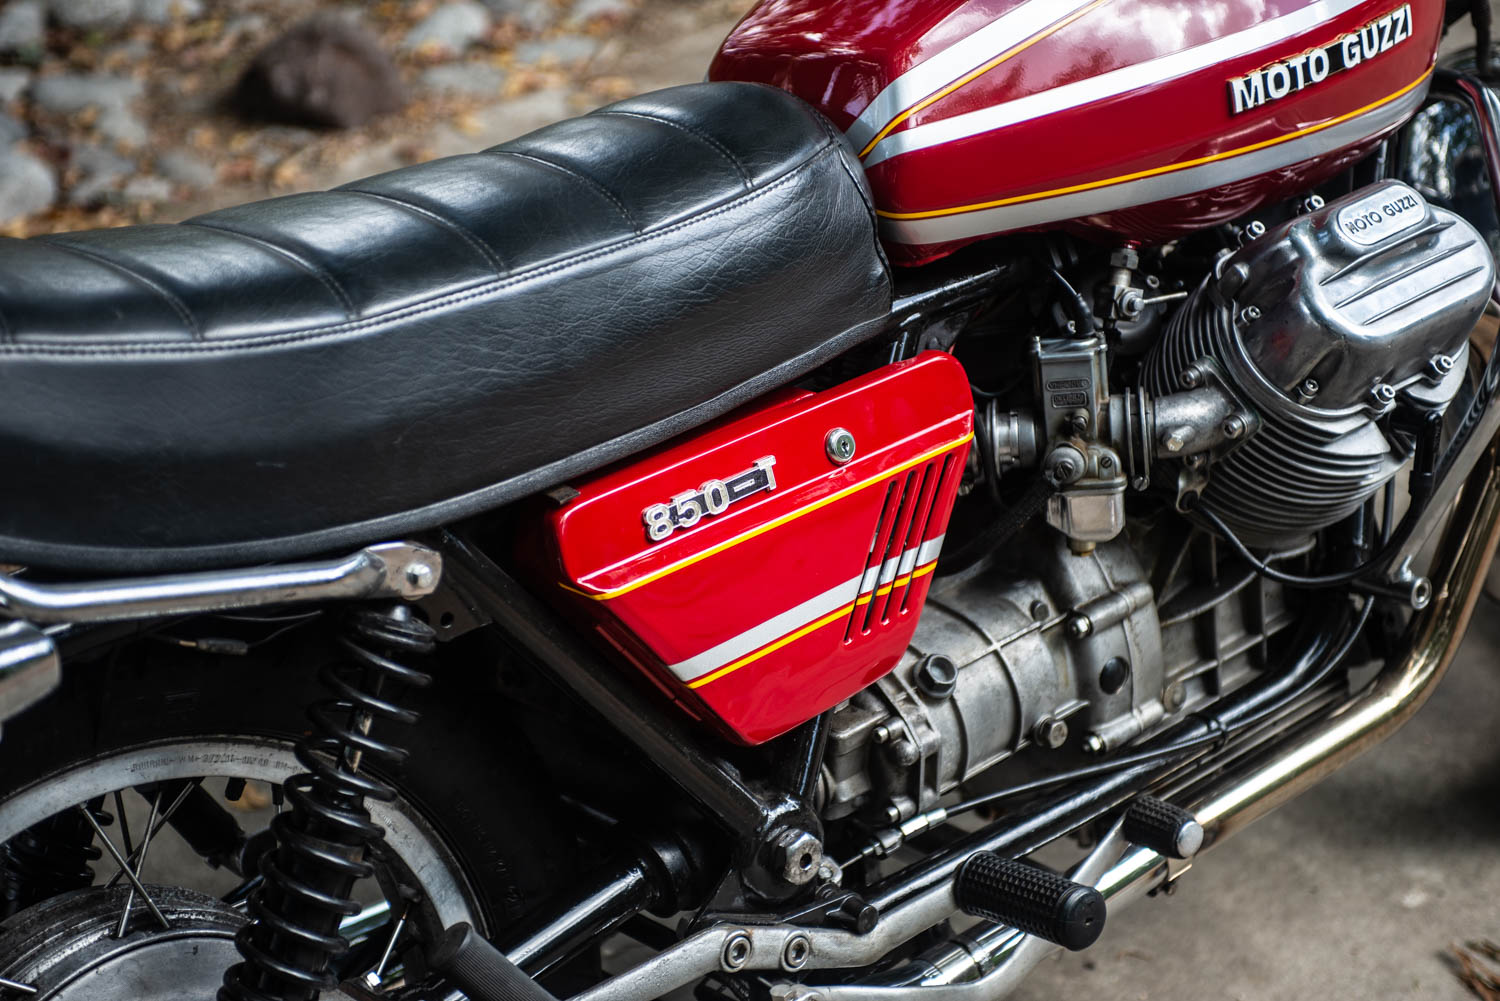
My bike, the 1975 850T model, was one of the first to utilize the somewhat unique and highly regarded “Tonti” frame (designed, of course, by engine designer Lino Tonti as well). It features removable lower frame tubes, which utilize the engine itself for structural rigidity, and allow the entire engine and transmission to be removed from the bottom of the frame. All this knowledge I gained, of course, in true fashion, AFTER purchasing this bike!
But, enough generic background! Let’s talk about the latest addition to my motorcycle garage…
“Well sorted by a retired Moto Guzzi dealership mechanic” was the headline banner greeting a viewer of the eBay listing for “my” Guzzi. That comforting statement certainly influenced my buying decision, encouraging me to overlook the obvious physical needs of the bike, which were noticeable even in the dark photos provided with the listing.. rusty exhaust system, and rusty hardware being most noticeable:

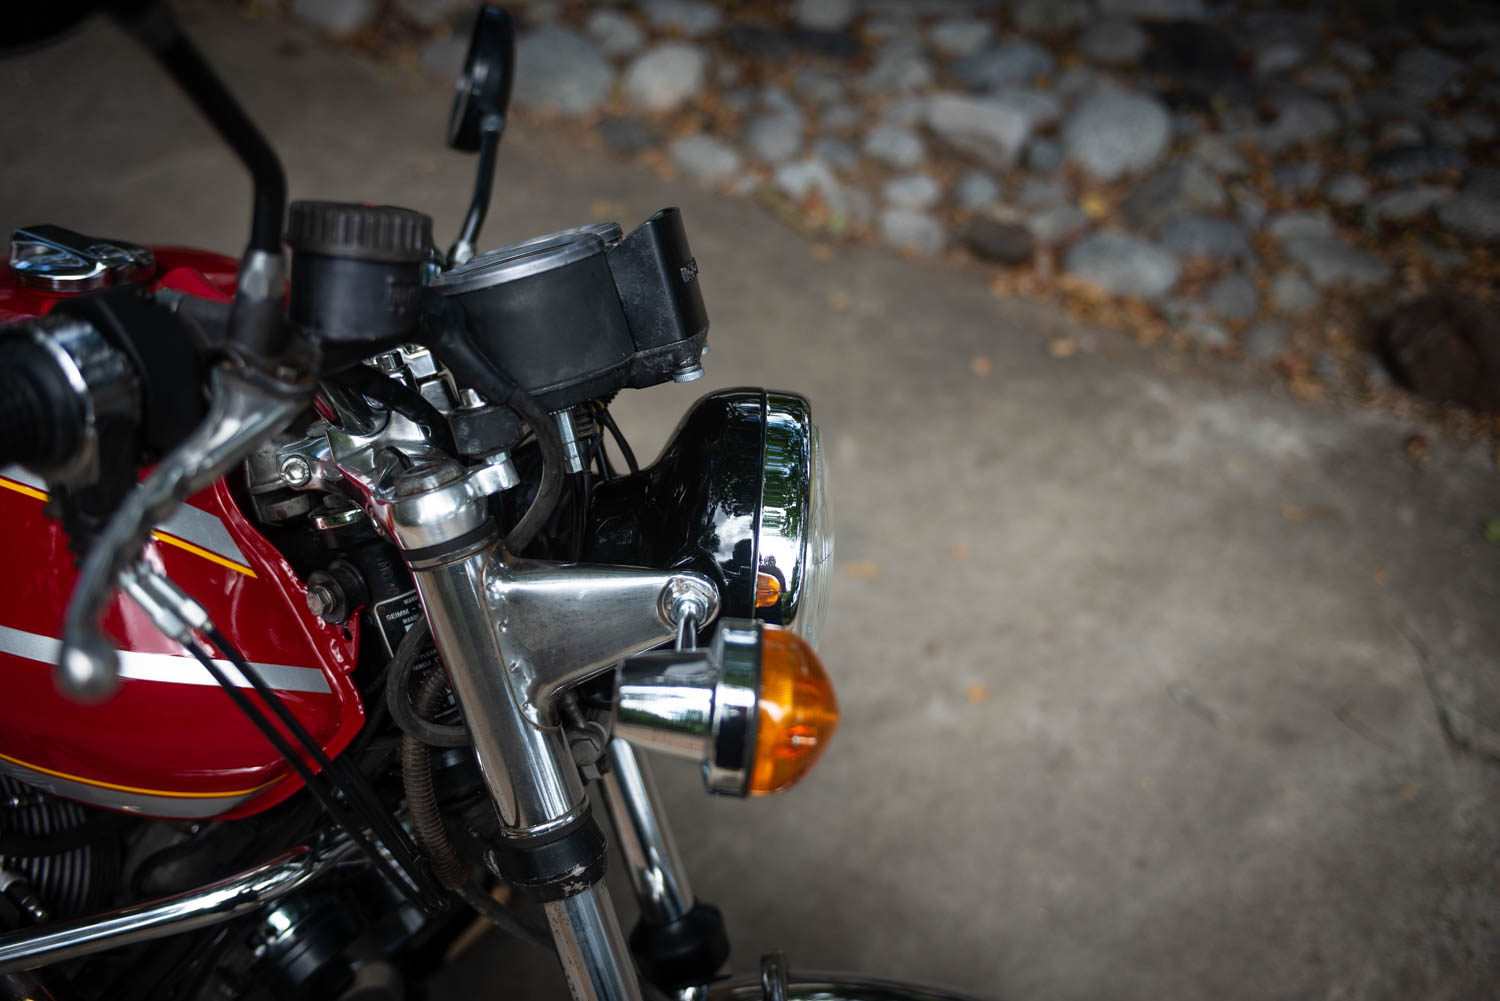
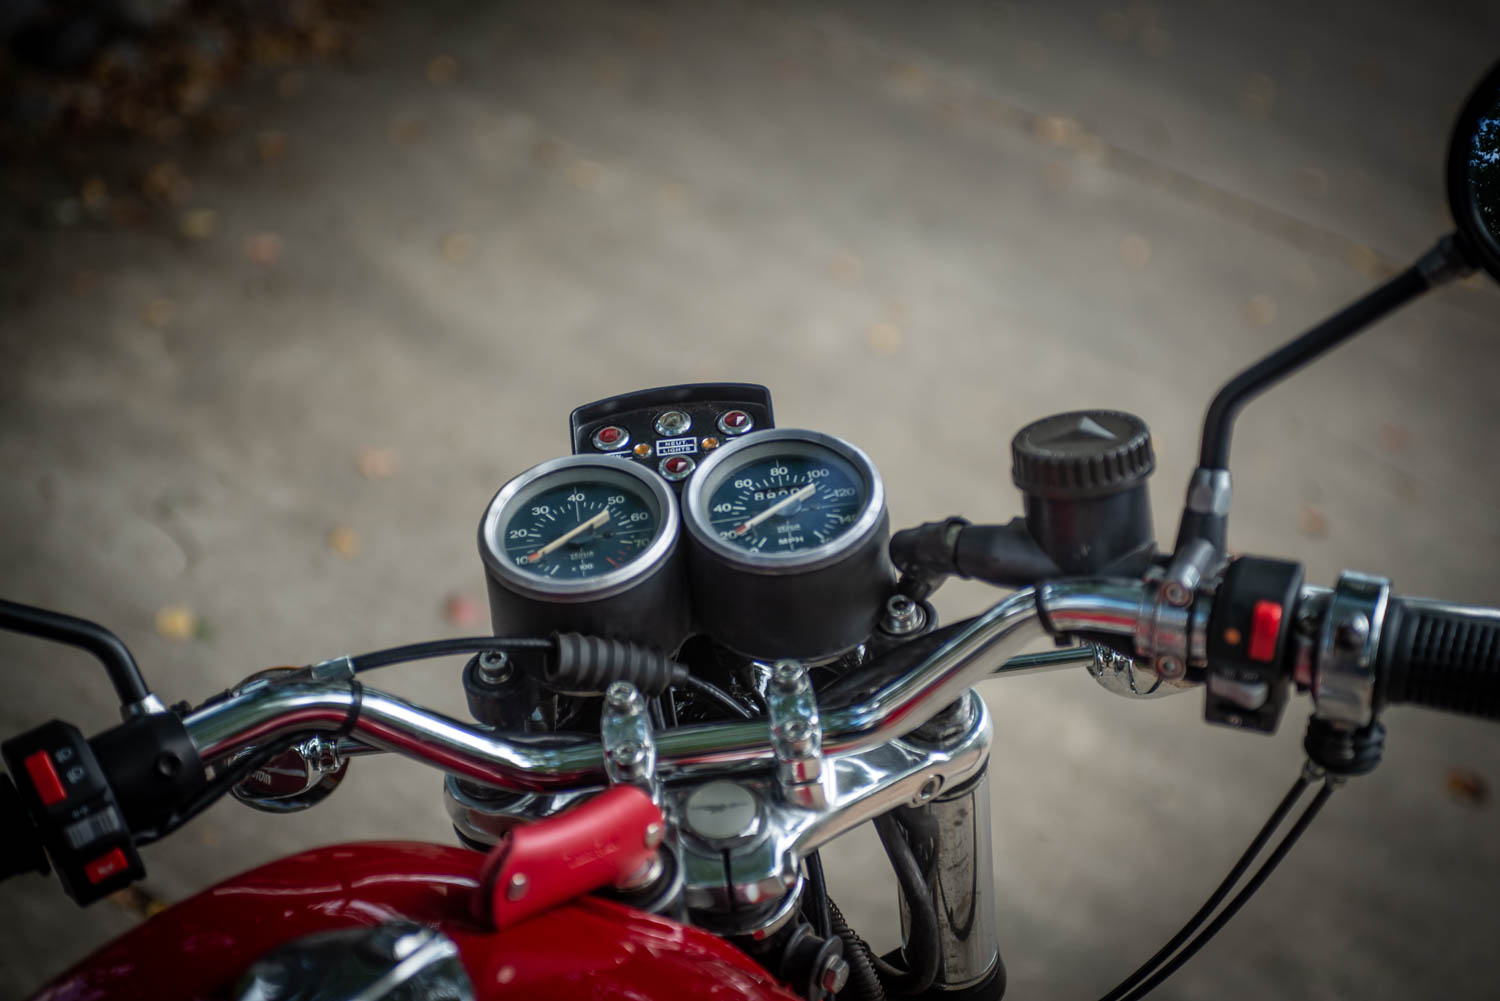
On the other hand, the P.O. (previous owner) did state a number of recently added improvements: new tires, new headlight and turn signals, new handlebar and switch gear, and new throttle clutch cables, and the bike appeared to have good bones. What could go wrong?
Therefore, I decided to take the plunge, and barged ahead. Following my usual M.O. for eBay bidding, I waited until literally the last 10 seconds prior to the auction closing to “show my hand”. Bidding had stalled at a reasonable $2,700 with no reserve, so someone was going home with this bike. For the uninitiated eBay observer, a bidder can enter any amount as his/her high bid, and the system will only set your bid at the minimum amount needed to top the current visible high bidder. That means that the current high bid could be backed by an even higher bid if another bid comes in. I decided the maximum I’d be willing to spend would be $3,150. At the 10-second-before-closing point, I pushed the button for my high bid, and likely, before any other watchers/bidders could respond, bidding was over and I had won the auction at an even $3,000. That means the previous high bidder had posted a maximum, hidden bid, of $2,950, so the bike was mine!
My subsequent, pre-arrival communications with the seller were amicable, and I was assured that the bike had been ridden regularly, and would need nothing upon arrival. Was I ever surprised!
It was a full month later that my chosen transport company finally arrived at my gate with the “new” Guzzi. Its arrival heralded the beginning of a huge laundry list of discrepancies, some major, some minor.
My first clue that this new acquisition wasn’t going to be a cakewalk in the park revealed itself immediately as the bike was unloaded from the transport. I noticed right off that the front forks/handlebars just flopped right over without restraint in both left/right directions, contacting the gas tank with potential for damage. EVERY bike has some sort of restraint/stop to prevent movement of the fork beyond a certain deflection in each direction, to insure there is no fork-to-tank contact. A quick visual examination revealed that the metal stop that should have been welded or cast into the frame, had broken at some point, and had never been repaired! (More about my solution later)
With the bike on the ground and in my garage, it was time for a rudimentary inspection (oil levels, air levels, fuel, etc) and then take the old gal for a ride. It took just a short ride to reveal a number of immediate deficiencies:
- The clutch just barely disengaged at full lever deflection.. so much so that it was impossible to shift into neutral with the engine running
- Idle speed was erratic and waay too high
- Rear brake was virtually and functionally non-existent
- Only one of the two cylinders was firing regularly
Sigh! No “ready to ride” for me! In order, I addressed the above issues:
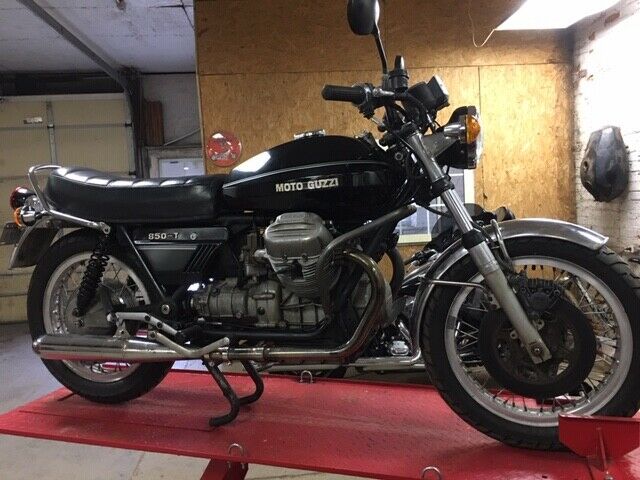
CLUTCH… It turned out that when the P.O. had replaced the clutch lever, apparently it was an after market unit without the appropriate amount of deflection to provide full clutch disengagement. The new cable he had installed did not allow proper adjustment of clutch release, even with the adjustment nuts at EACH end of the cable adjusted to their absolute maximum limits, the clutch wasn’t properly and fully disengaging. On further investigation, I discovered the first of the many “shade-tree-mechanic” approaches this guy had employed to cobble this bike into “saleable” condition”
In a failed attempt at increasing adjustment length, this guy had just slipped a slotted washer over the cable housing ferrule to give it more length. You can just imagine how smooth and consistent that made clutch operation (grrr):
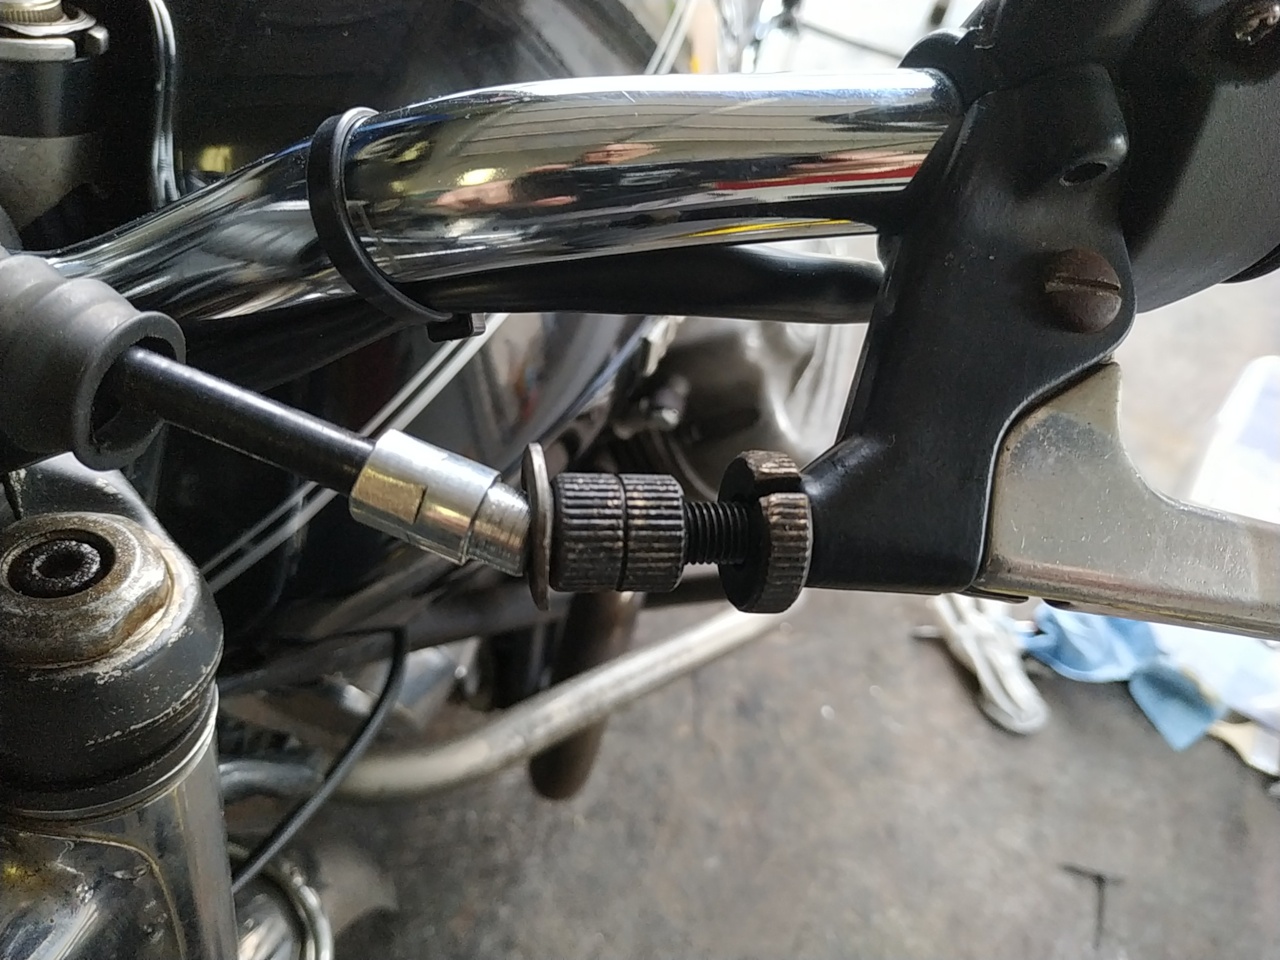
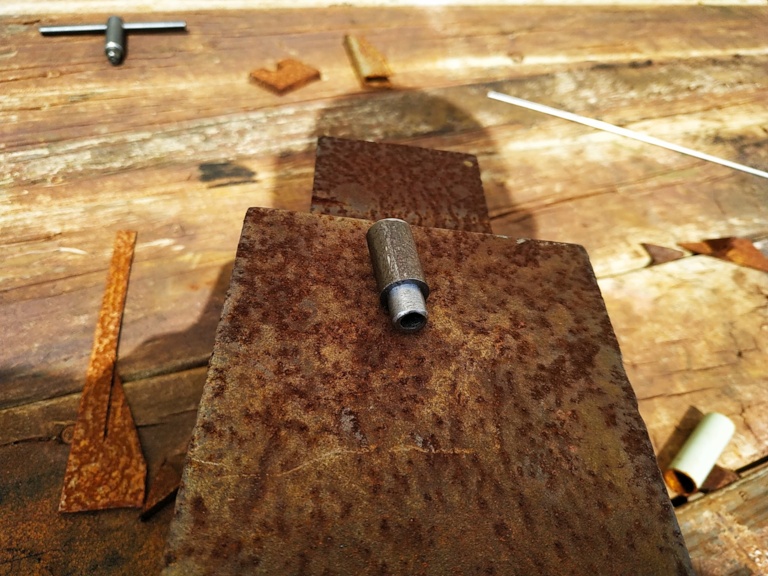
I solved the problem by turning a spacer on the lathe that would properly extend the working length of the cable housing, and fit securely in the adjuster nut:
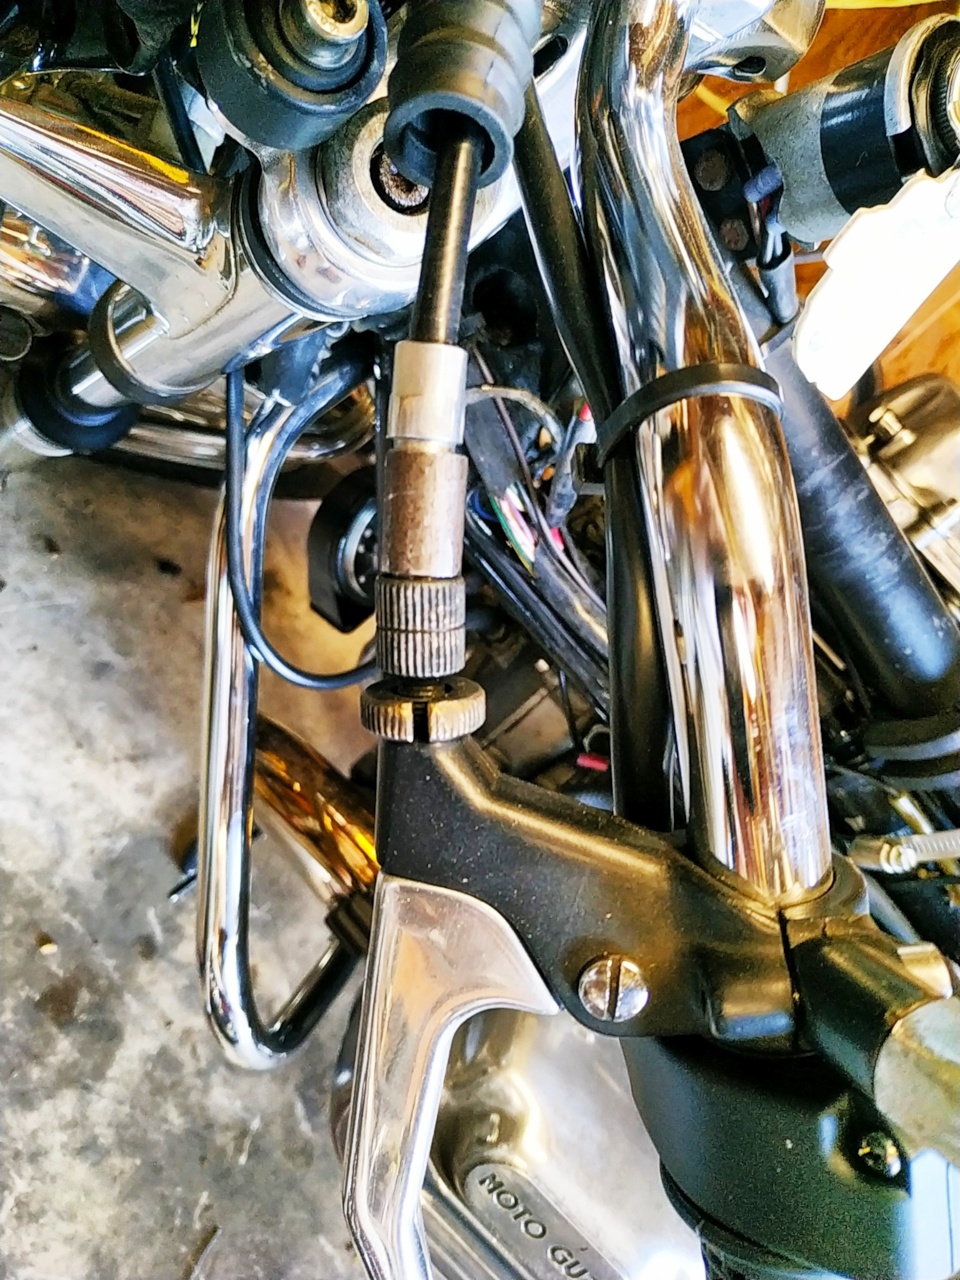
The new fitting, properly sized, did the trick, placing the adjuster at each end at mid-travel for proper clutch disengagement/engagement range of adjustment:
The list of discrepancies on arrival kept growing as I went around the bike:
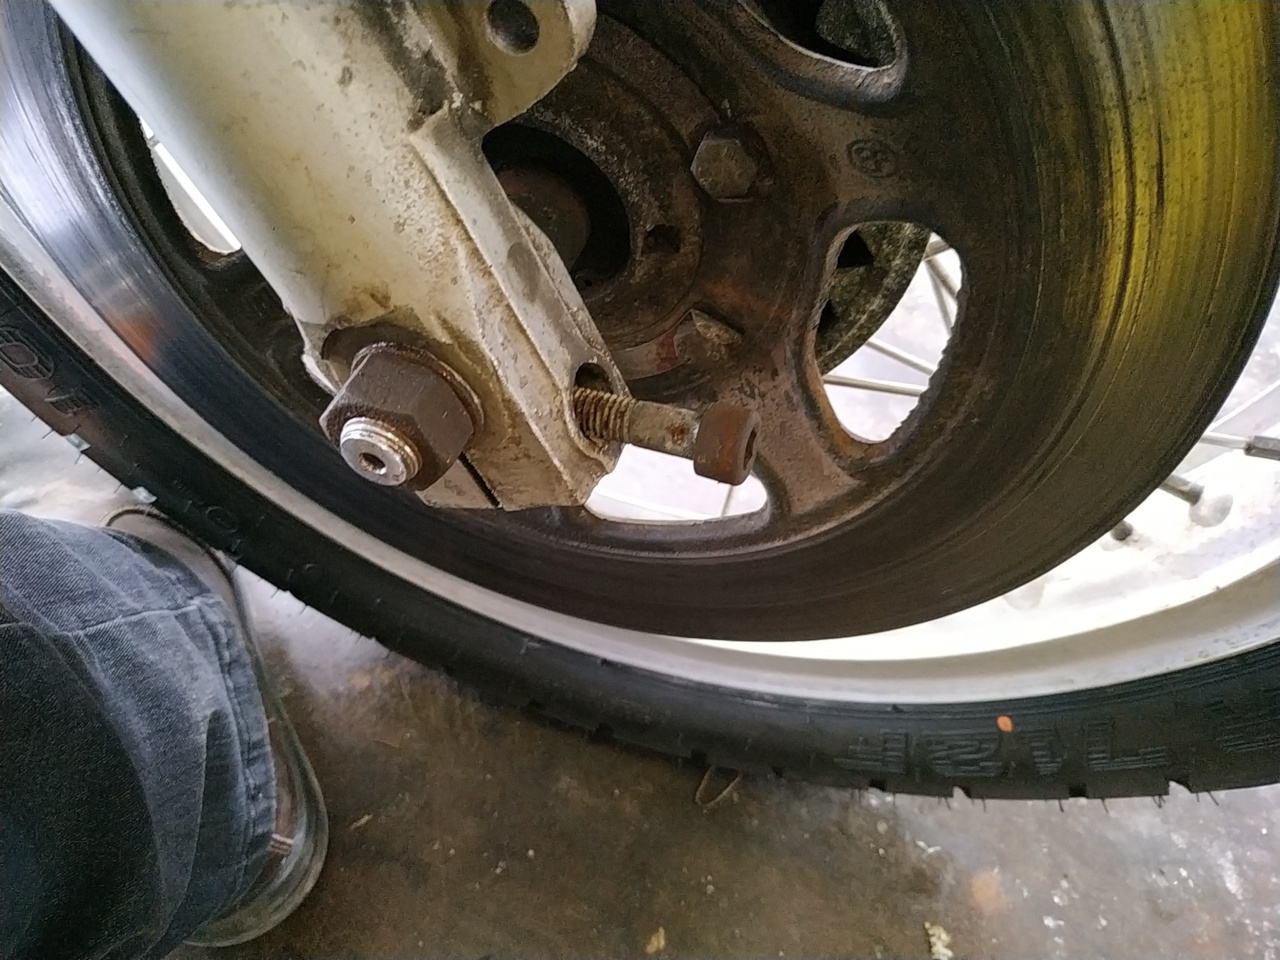
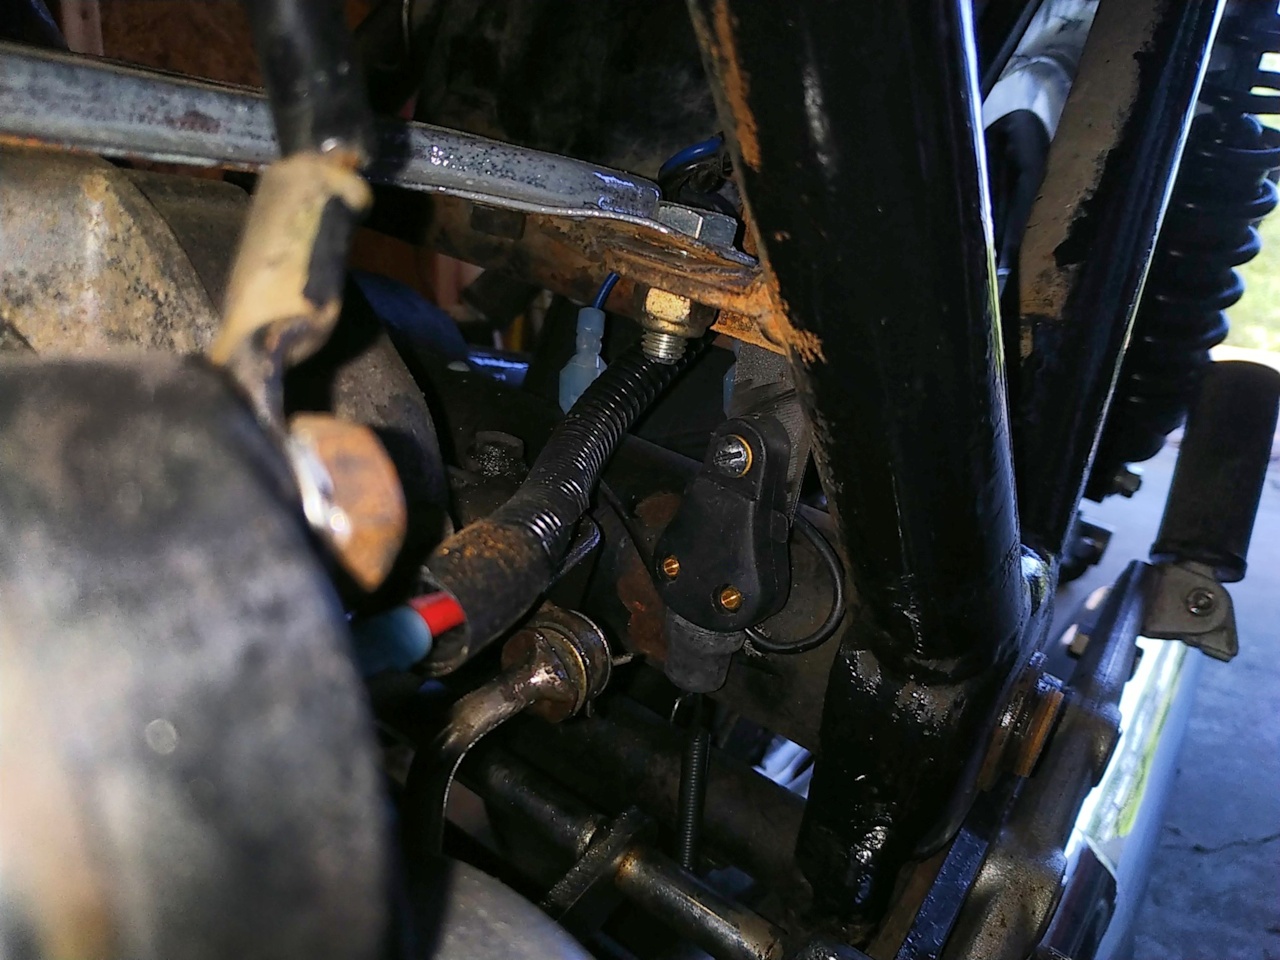
The front brake pads were worn alarmingly thin, and while investigating and correcting this, I noted another alarming issue.. the cinch bolt holding the front axle to the fork was literally falling out of its hole, while the one on the opposing side was just finger tight:
The turn signals and headlight operation functioned only intermittently, a problem I spent hours and hours resolving. After going through replacement of a couple of flasher relays, yielding, again, intermittent results, I finally traced the problem down to the P.O.’s ham-handed work installing new wires from his replacement turn signal kit into existing Molex multiple pin connectors inside the headlight bucket. It appeared he must have used something like a pipe wrench to “crimp” the connectors to the new wiring, with the expected results. His innovative installation of the one of the turn signal stalks was indicative of his “experienced Moto Guzzi mechanic” work:

Next, there was an inoperative neutral light indicator (the P.O.’s response: “not needed”). A quick check determined that there was not even a wire connected to the neutral switch at the transmission nor any suspect in the vicinity. Running a new wire from there to the neutral light in the console solved that problem.
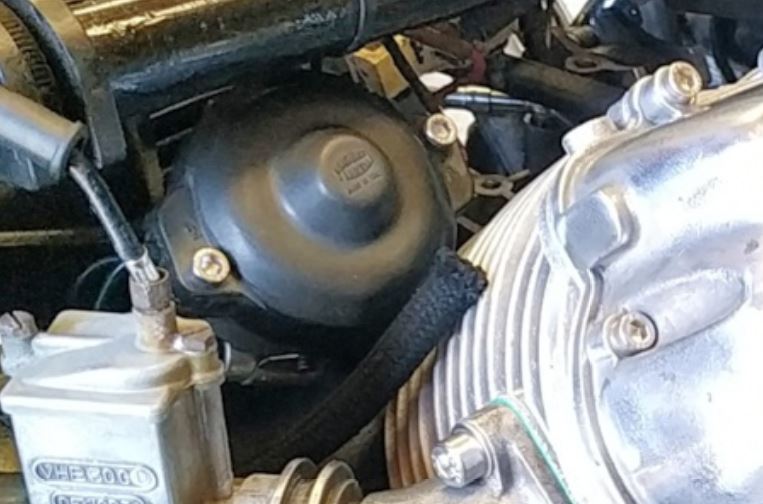
As previously mentioned, the engine was running just on one cylinder, the other firing only intermittently. In short order, I traced the problem to a bad ignition condenser on that side (The Guzzi ignition system features separate points/condensers/coils for each cylinder). While changing out the condenser in the automotive-style “breaker housing” (essentially a distributor without rotor due to the dual coils), I noted the points on both sides were worn to the point of not being able to properly adjust the gap, so those both got replaced as well:

You can see the slot in the center shaft that was clearly designed to accommodate an automotive-style rotor, and cap, but the Guzzi’s “distributor” merely has a flat cap with no spark plug wire provision, each plug wire is connected to the high-tension socket on its respective coil. Most likely, Guzzi used an off-the-shelf Fiat distributor, or similar, for this purpose.
Timing for each cylinder has to be set separately, and, following the workshop manual, after setting timing on the primary cylinder, I found there wasn’t enough lateral movement with the secondary set of points to achieve the proper timing for that cylinder (a recognized, and commonly discussed issue). This necessitated removing the complete distributor, and disassembling the rotor plate to enlarge the slots to allow further adjustment movement. Removing the “breaker housing” requires a special factory tool to get at the two distributor hold-down bolts, but of course, that tool is NLA (and would be quite expensive anyway). After studying pictures in the manual of the tool, I constructed one that worked better than original, using a cut-off 13mm open end wrench and a bit of welding. The nut at the top allows a ratchet wrench to turn the tool, and I added the welded washer at top to prevent the wrench from slipping off the nut. This was constructed of just plain steel rod, but I polished it on the wheel and then gave it a coating of transparent clear coat to protect the shine:

The side panel/tool lockers on each side of the bike originally came with keyed locks to keep the panel doors closed. On “my” bike, the locking mechanisms and holding arms were both missing, so the P.O.’s solution was to clervely secure each door with a tie wrap. I guess his idea was that the rider would travel with a pair of snips and a ready supply of tie wraps in his pocket to gain access! Not surprisingly, I was able to purchase a PAIR of generic, same-keyed locks on Amazon for $13 with free shipping. A mere minor modification was needed to have these fit and function perfectly:
Speaking of those side compartments.. Originally, the Guzzi was built with the pair of smaller-than-normal ignition coils attached along the center top frame member, underneath the gas tank. Some enterprising P.O. had decided to cheap out with a pair of automotive-sized coils, which wouldn’t fit in the designated location, so their solution was to mount one coil inside each side compartment, essentially leaving NO space for tools, or other accessories (a beautiful, first class installation, huh?):

I decided to relocate one of the coils (pictured above) back underneath the gas tank (not enough room for both). Later, after repaint of the side compartments, I found a way to mount the second coil just in front of the downtube, safely and securely out of sight.
Additionally, by consulting the wiring diagrams, I determined that that big relay just to the upper right of the coil was the original starter relay. Studying the schematic, I could see that this relay functioned just as a standard 5-pin Bosch relay would. So I rewired that relay, replacing it with a much smaller (and inexpensive) Bosch relay and repositioned it to the other side compartment, leaving the above compartment completely free for documents, tools, or other accessories.

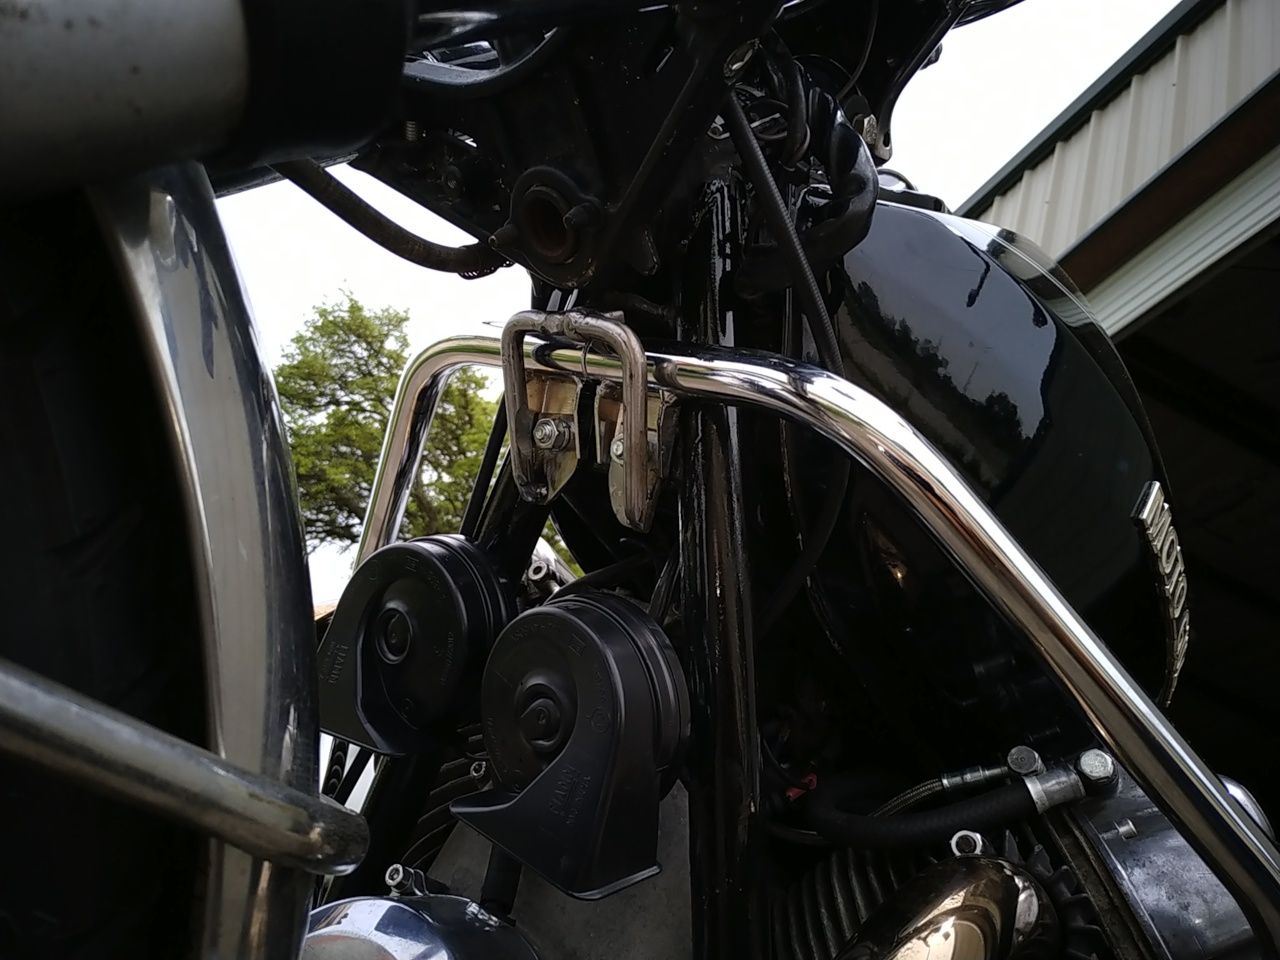
Next, I addressed the lack of a front fork limit stop, as previously mentioned. The first thought was to weld a new stop to the frame, but I was concerned about weld splatter on surrounding components, as well as the difficulty of holding it in place, and permanency if I got the position incorrect. I finally decided to utilize two upper bolts that secure the “crash” guard, and fabricated bolt-on stops to do the job. That allowed me to do several trial fittings and adjustments until I got it just right. While I was in that vicinity, I added a pair of very loud Fiam horns for maximum attention:
Next was the brake light, which also operated intermittently. Further investigation revealed that the P.O. had added a cheap Chinese universal switch, and had secured it to the frame with a tie wrap! As I was attempting to adjust it, the entire switch just broke apart in my hands! A $20 switch from a reputable parts house, and a fabricated adjustable mount secured to the frame, did the job.
Then, I endeavored to check and adjust the valve clearances. That’s when I discovered that some bozo had tried to force stop nuts of incorrect thread pitch on each of the rocker adjuster studs. These incorrect nuts had boogered up the threads on the rocker adjuster to the extent that correct adjustment was impossible. That necessitated sourcing new rocker adjusters ($20+ each x 4). To avoid ruining the threads within the rocker arm itself, I opted for cutting off each nut, leaving good threads left to back out of the arm. Then, as shown in the photo below, with no adjustment extrusion on the cut off end, I cut a screwdriver slot in the ball end to allow me to extract the offending piece with a screwdriver:

There were other annoying and exasperating discrepancies I discovered, such as muddy brake fluid (lots of water, and a leaking rocker supply oil line) that I had to deal with.
Finally, with most of the mechanical deficiencies corrected and dealt with, it was time to devote my attention to other areas. After reviewing forum posts of other owners of this model, I discovered that Moto Guzzi had employed chrome plated cylinders (in the internal bore) originally with their engines. The chrome is very hard, and can resist wear for quite some time, however, over the years with these engines, it is quite common for the chrome layer to begin flaking off, ultimately, and frequently, clogging up oil passages, and in many cases, rendering an engine permanently ruined and unusable. Later updated cylinders featured steel liners with a “Nikasil” coating, the same technique employed by BMW and Porsche successfully. The test to determine if your cylinders are steel or chrome is to insert a small magnet tool through the spark plug hole. A chrome cylinder will offer no attraction to the magnet, while a Nikasil bore will weakly bond to the magnet. Sure enough, my test confirmed I’ve got chrome cylinders.
I’ve already been through one harrowing adventure with clogged oil passages on my 1953 Ariel, resulting in a broken rod and literally thousands of dollars worth of repair expense (see “The Queen’s Revenge” ) and had no stomach for a repeat performance. So, after a bit of research, I discovered I could purchase a pair of brand new Gilardorni brand (same as Guzzi original) cylinders, along with pistons, pins, rings, and gaskets, from Germany for about $700 including shipping to Austin. That struck me as pretty cheap insurance against another engine blowup.
My cylinder set arrived in a matter of weeks, beautiful packaged, and ready to install:
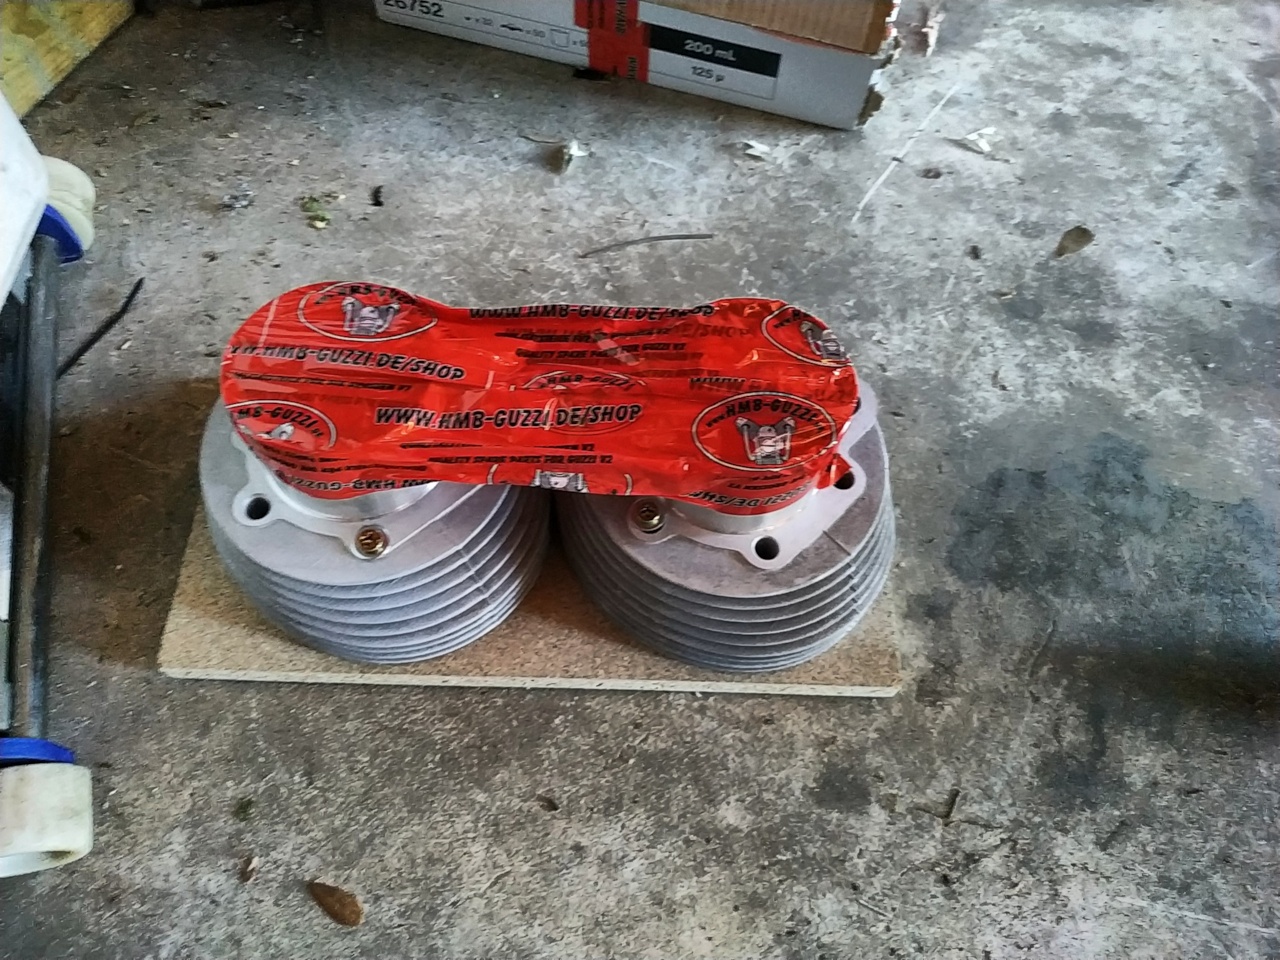
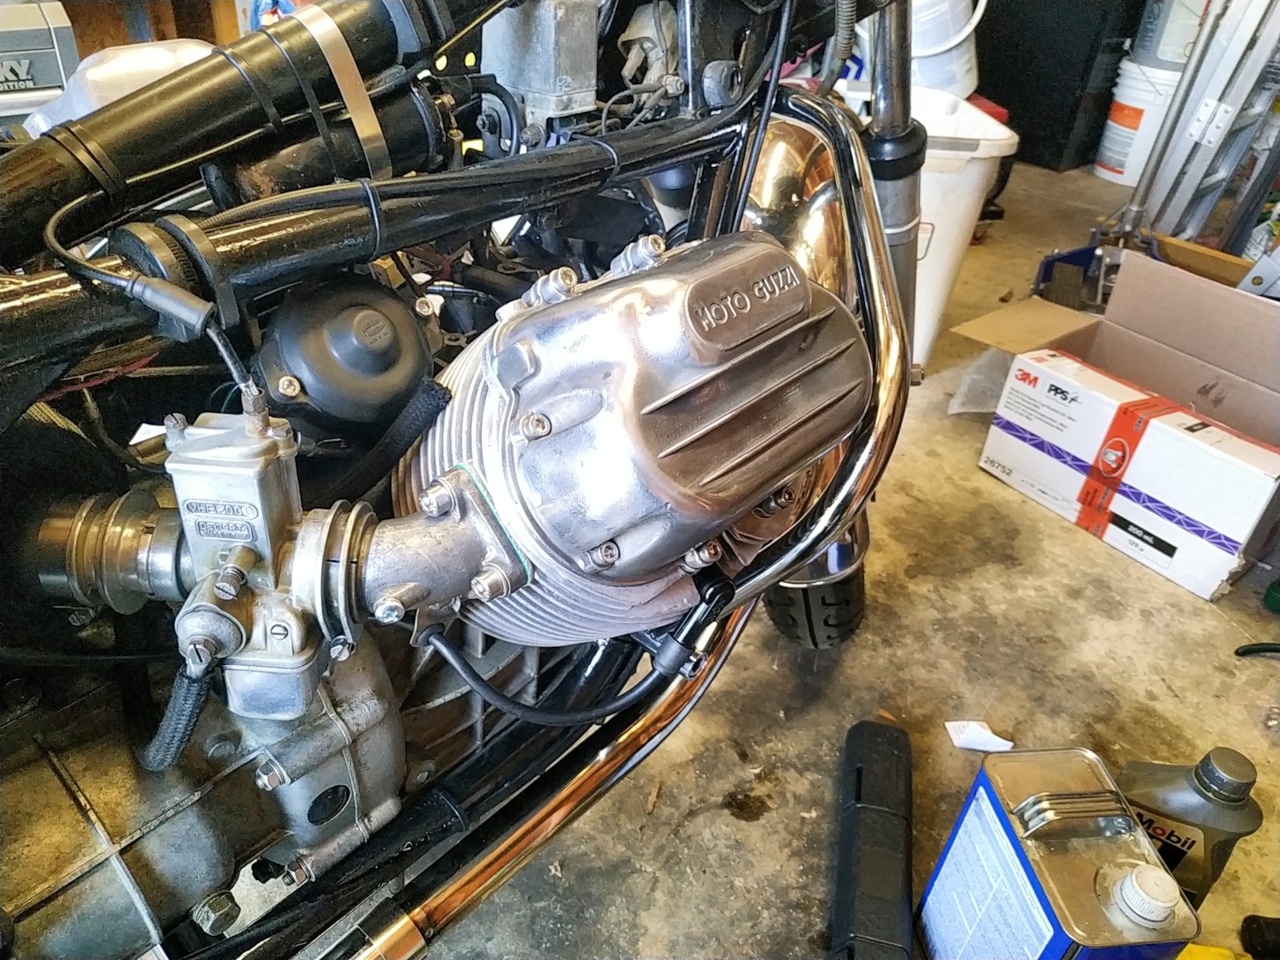
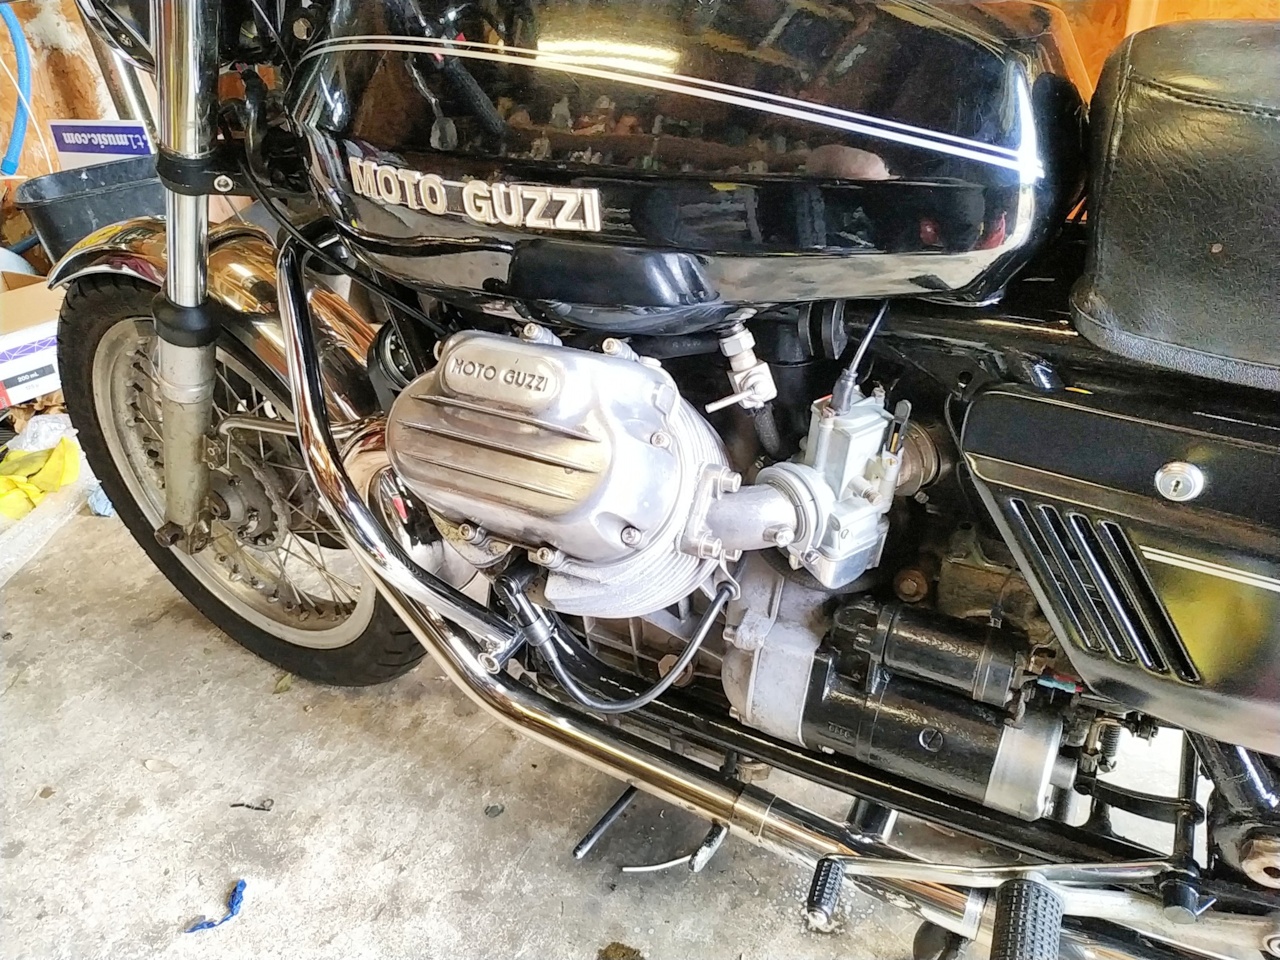
One of the beauties of the classic Guzzi transverse V design is the ease of access to cylinders and heads. Replacement couldn’t be easier:
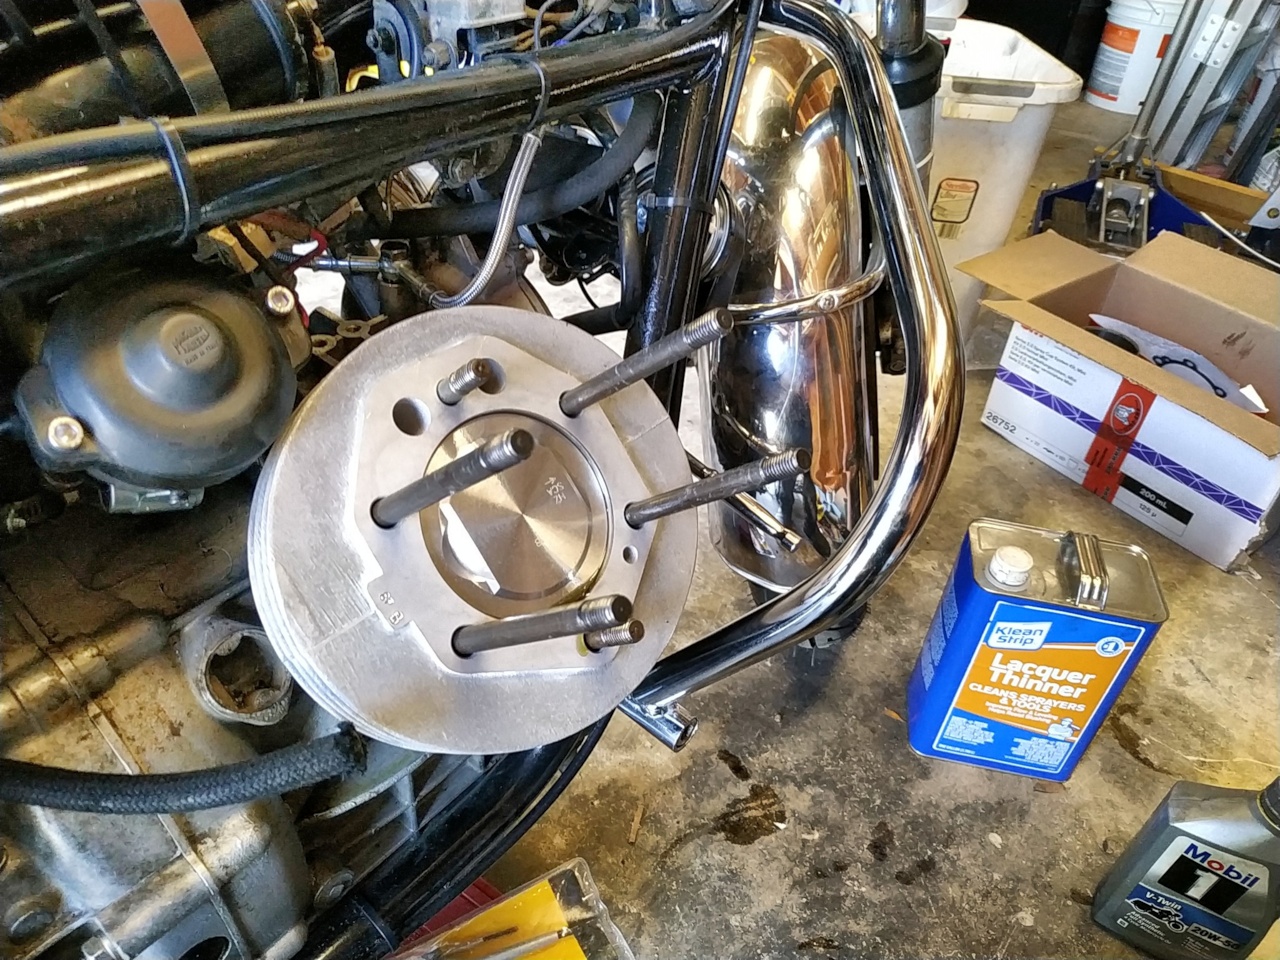
Remove the exhaust pipes and carburetors, remove the 6 nuts holding down both the head and barrels, and lift the components right off.
When installing the new pistons and cylinders, I found that a standard radiator hose clamp was just barely wide enough to compress the 3 rings on the piston for installation (no conventional ring compressor tool could clear the four studs that hold the cylinder and head in place). It was a pretty simple job to slip the cylinder barrel in place, followed by the head :
One side benefit of the new cylinders? It seems that Gilardoni currently does not supply cylinders in what would have been the original 83mm diameter size (roughly 850cc) for my bike, and they only have the larger bore 88mm cylinders used originally in the “1000cc” engines (950cc roughly). The supplier I purchased this kit from assured me that these larger internal bore cylinders were physically the same size externally, and would install without modification (turned out to be true). Therefore, the new cylinder offers a capacity increase of roughly 15% and presumably similar increase in power.
It took only about 2-3 hours per side to install the new cylinders, get everything buttoned up, and give the engine it’s first test run. Voila! It started immediately, and purred like a kitten. A worthwhile addition indeed!
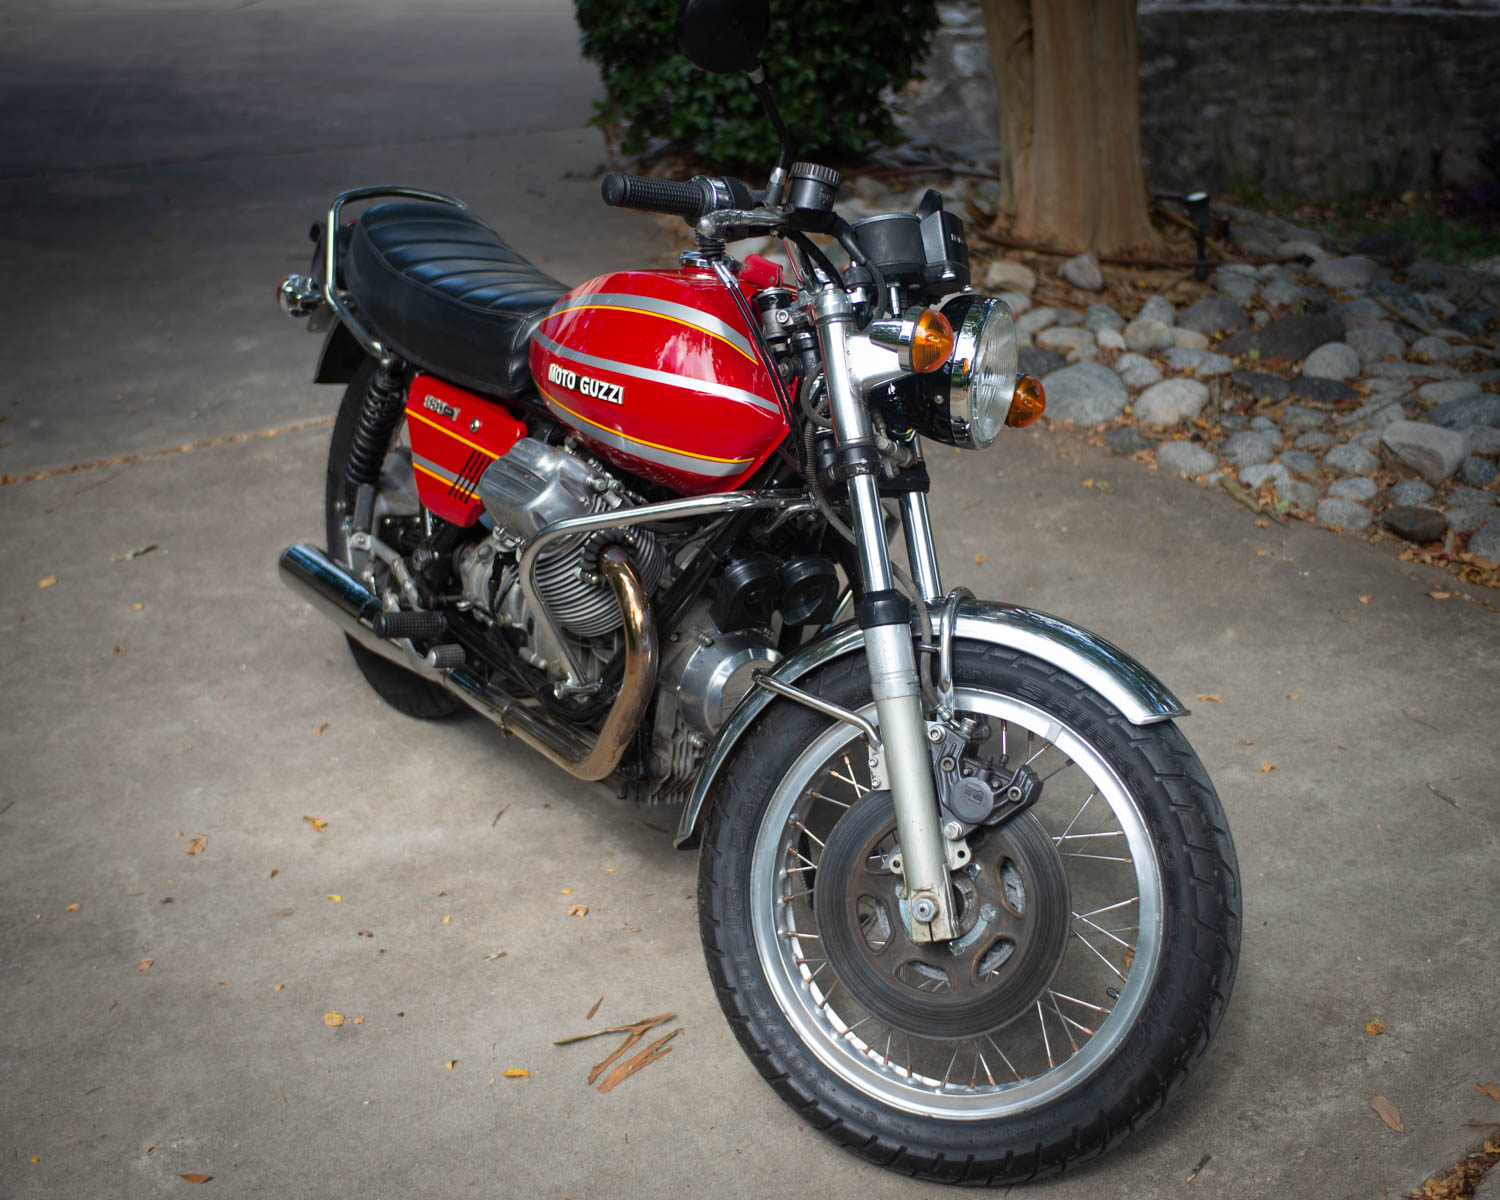
Now I could devote my attention to enhancing some of the appearance items on the bike. My first step was to order a complete stainless hardware set, to replace virtually all of the original, very rusty nuts and bolts on the bike.
Next came new exhaust pipes, mufflers, and crashbars.
The handlebar hold downs looked pretty crusty to me, and I could tell that they must be a cast aluminum pieces, so I pulled off one at a time, used paint remover on each, followed by several sessions on the polishing wheel:
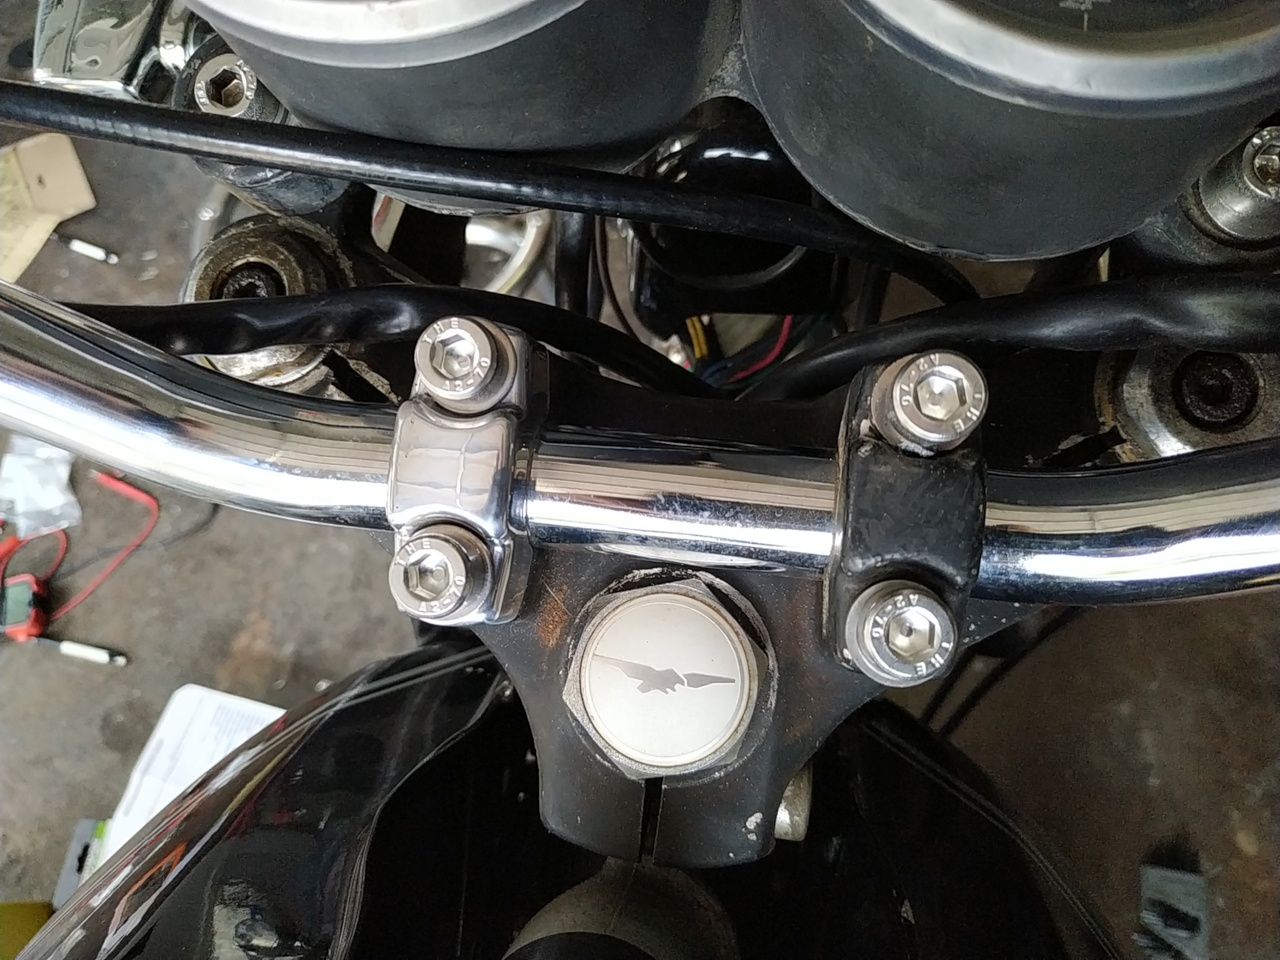
The first one went so well, I continued, including removing the triple tree and giving it the same treatment:
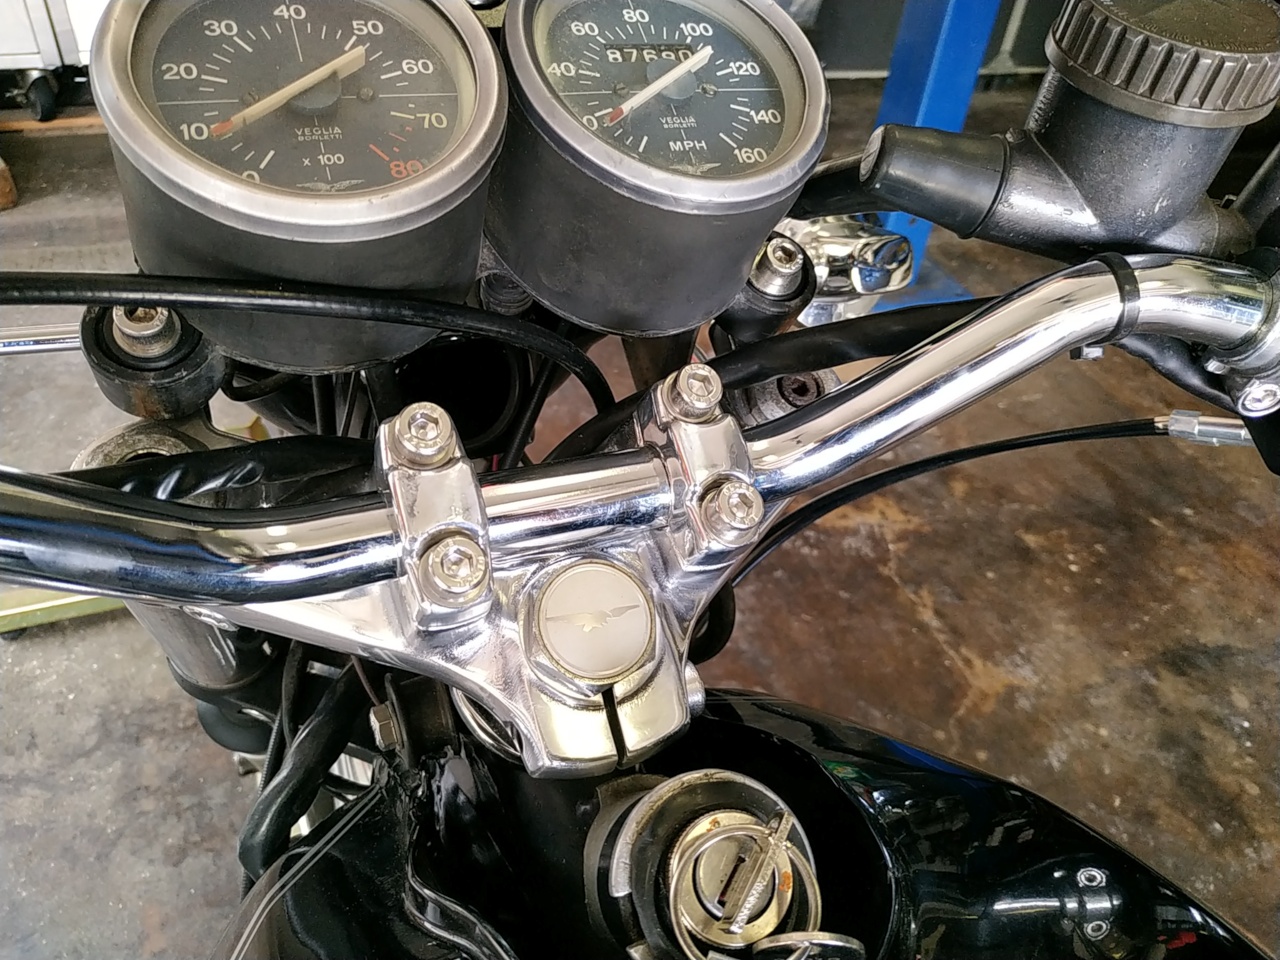
Now it’s starting to look like a decent bike!
A modified “frame-on” frame paint job was next. While not perfect, the new paint really spruced up the old gal.
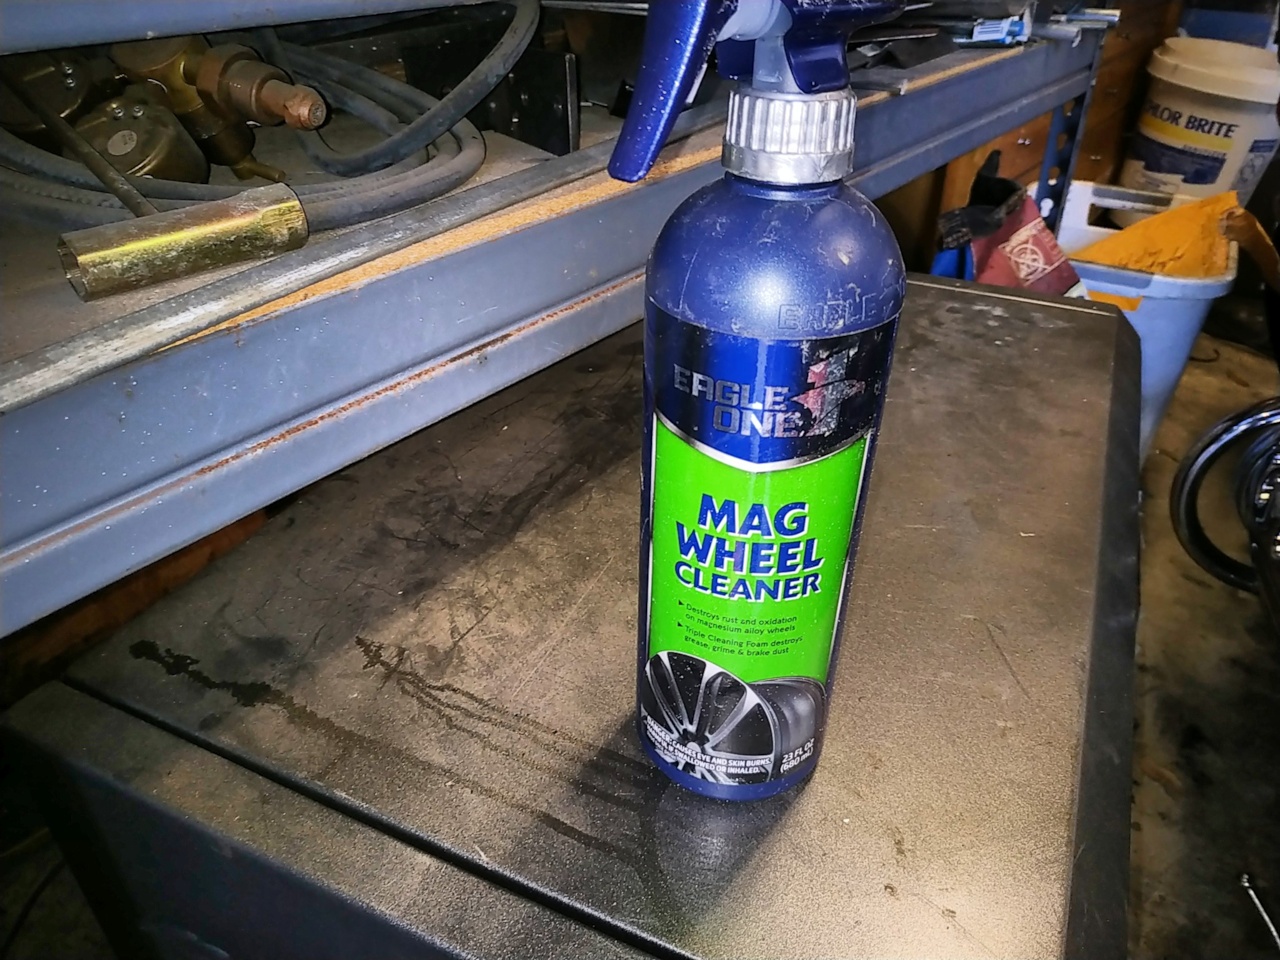
The complete engine, including carburetors, were treated to a bath in my new favorite concoction for aluminum cleaning.. this stuff is amazing (Amazon, of course):
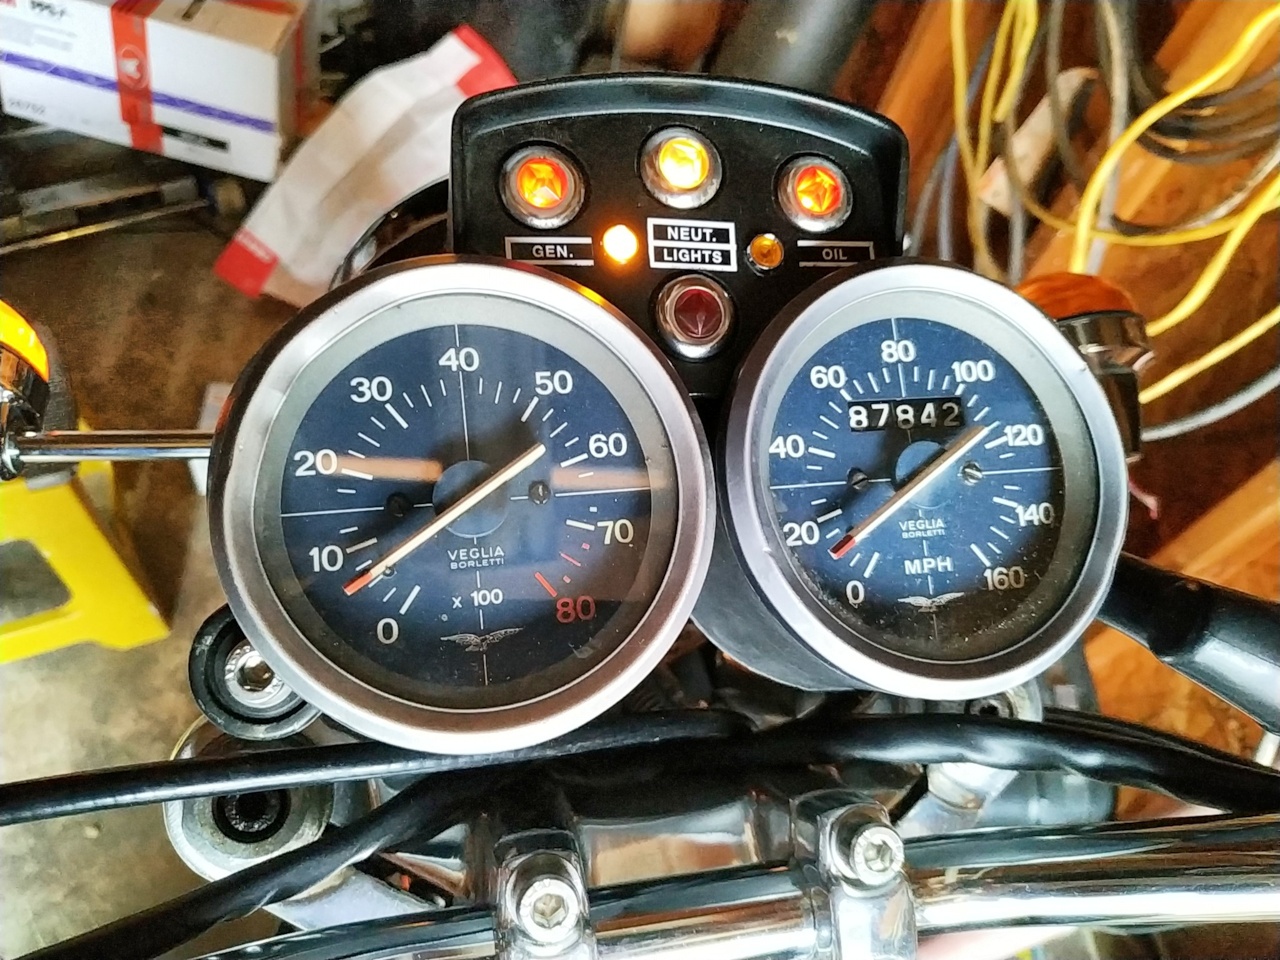
For the finishing touches, the Guzzi didn’t come stock with turn signal indicator(s). I noticed that someone had drilled an extra hole in the warning lights console and then covered it with a rubber plug:
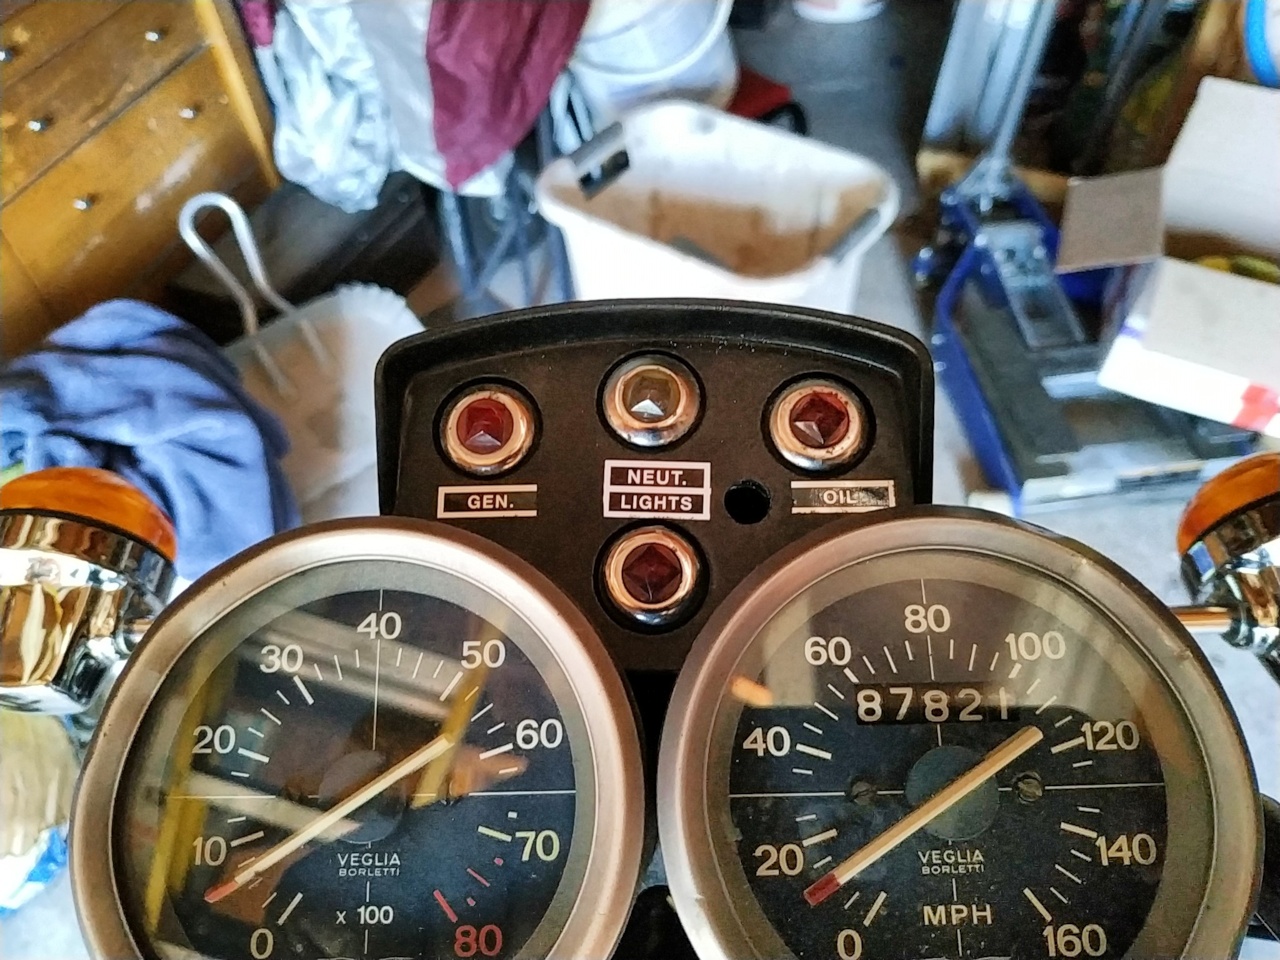
I decided to kill two birds with one stone, and add turn indicators for both sides, utilizing that open hole and drilling an additional one. A bit of research on Amazon turned up a handful of LED indicators in various colors, with the exact diameter I needed, for about $10 total. A couple of short wires from the headlight nacelle (turn signal wiring) and the indicator console was all that was needed to give me some visual reminder my blinkers are still operating:
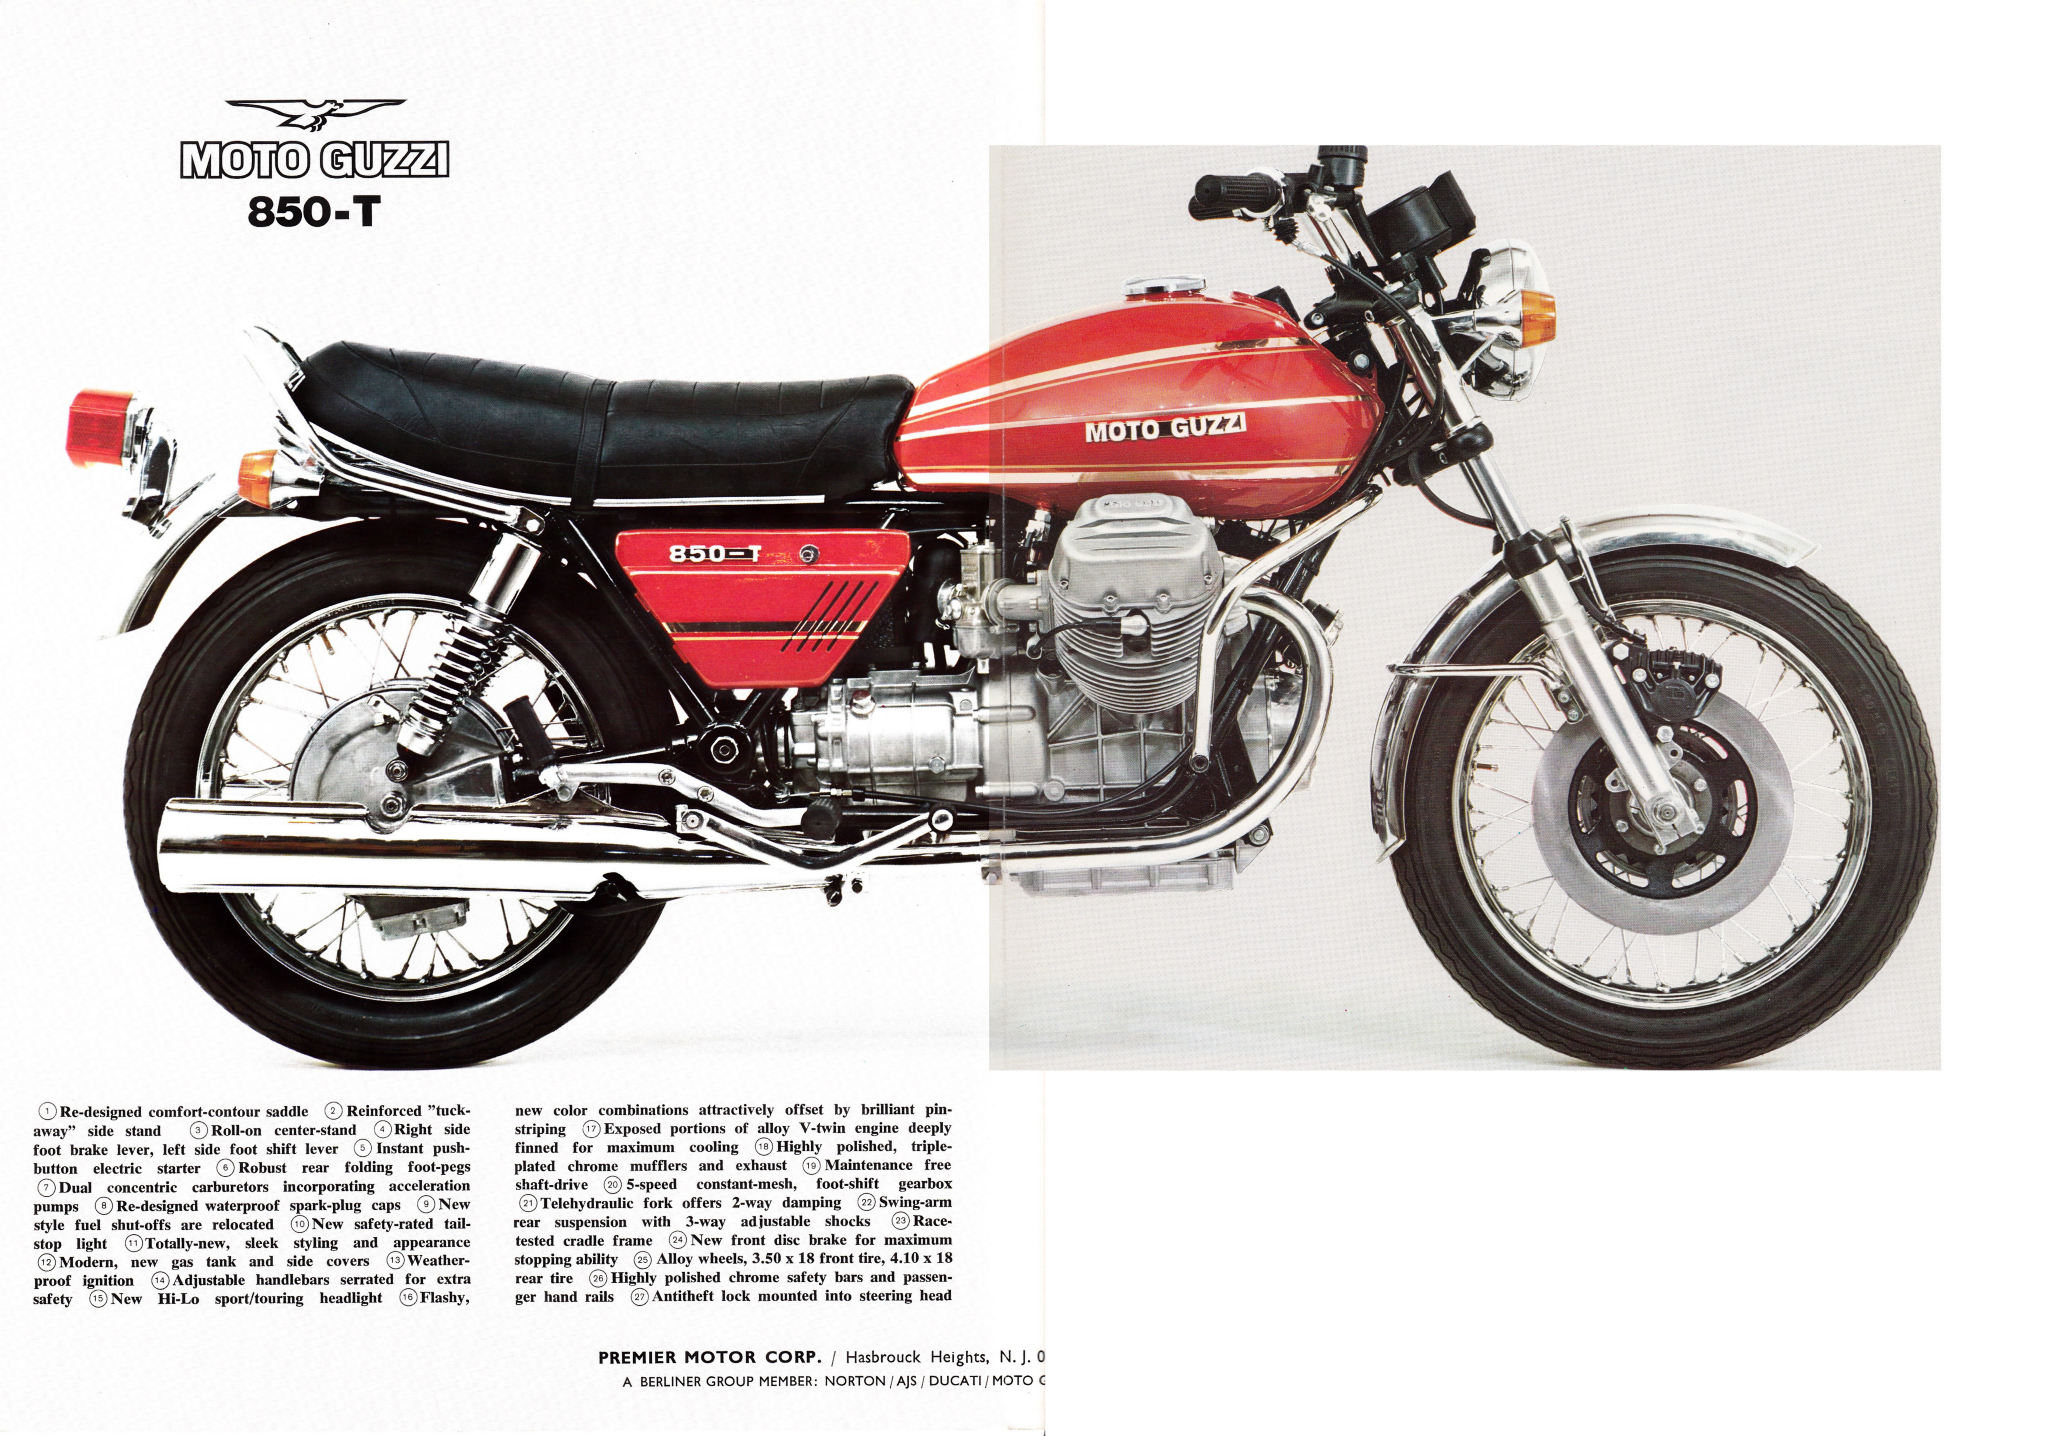
For the final (and economically irrational) step… I’m currently having my 1959 MGA Roadster repainted in its original Orient Red at my favorite paint shop “Collision Repair Center” or CRC on N. Lamar Blvd (I believe this is the 6th job I’ve had them do, all to great satisfaction). I thought as long as they have the red paint out, they may as well repaint the Guzzi tank and side panels. I’ve provided this photo from a period brochure, and the color looks very close to my MGA color:
Last week I finally picked up the newly painted and striped (basecoat, pinstripes, then clearcoat over) tank and side panels from the shop, and couldn’t be more pleased. The old gal is now looking like a decent rider, and I can confidently say “It’s a wrap”!